There’s something truly magical about desserts that come together effortlessly, especially when they embody rich flavors and delightful textures like these Red Velvet Dessert Cups. I remember the first time I laid eyes on a stunning dessert served in a fancy glass. I thought it was something only a pastry chef could create, but I discovered that with a little creativity and love, I could whip up something just as impressive in my own kitchen. Now, I want to share this joy with you — let’s dive into a treat that’s perfect for any occasion!
Recipe Timing
- Prep Duration: 20 minutes
- Active Cooking: 10 minutes
- Total Duration: 30 minutes (plus chilling time)
- Portion Size: Serves 4-6
- Complexity: Simple
Nutritional Recipe
- Calories per portion: Approximately 300
- Protein: 5 grams
- Carbs: 38 grams
- Fats: 15 grams
- Fiber: 1 gram
- Sugars: 22 grams
- Sodium: 300 mg
Why You’ll Love This Red Velvet Dessert Cups
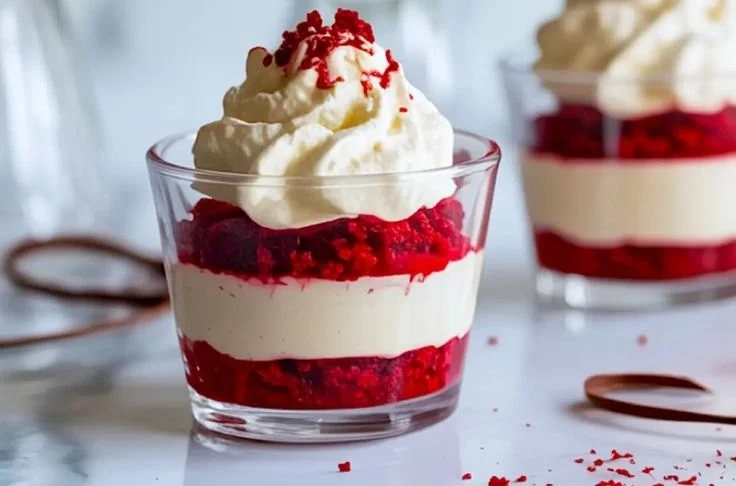
These Red Velvet Dessert Cups are not just a treat for the taste buds but also a feast for the eyes. The vibrant red layers of the cake combined with the airy sweetness of vanilla mousse create a stunning aesthetic. Perfect for festive gatherings, or simply when you’re in the mood to indulge, these cups echo celebration in each bite. Whether you’re a long-time lover of red velvet or a newcomer tempted by its allure, you’ll find these layered delights hard to resist!
The Complete Cooking Journey
Imagine an afternoon spent with the essence of red velvet filling your kitchen. The sweet aroma wafts through the air as you layer, create, and ultimately pull together this gorgeous dessert. Each step connects you closer to the heart of the recipe, from preparing the cake to the joyful moment when you serve it to eager guests. Let’s embark on this delicious journey and see how easy it is to create something show-stopping!
Ingredients:
- Red velvet cake (leftover or boxed)
- Vanilla mousse
- Clear glasses or jars for serving
Method:
Step 1: Prepare the Red Velvet Cake
Prepare the red velvet cake according to package instructions or if you have leftover cake, cut it into small, delightful pieces. This is where your baking journey begins, with that rich, buttery aroma filling your space, beckoning you to indulge.
Step 2: Whip Up the Vanilla Mousse
In a separate bowl, prepare the vanilla mousse. This creamy concoction brings a lightness that perfectly balances the richness of the red velvet. Don’t skimp on the mixing here; a smooth, fluffy mousse is essential for those heavenly layers!
Step 3: Layer the Sweetness
Begin layering your dessert by adding a spoonful of red velvet cake pieces into the clear glasses or jars. This visual presentation adds to the excitement of the moment!
Step 4: Repeat the Layers
Next, dollop a layer of the vanilla mousse over the cake pieces. Repeat this process until the glasses or jars are filled, creating a beautiful explosion of color and texture. Watching the layers build is like painting a masterpiece!
Step 5: Chill to Perfection
Cover the filled jars with plastic wrap and chill them in the refrigerator for at least an hour. This is the moment where patience pays off. The chilling allows the flavors to meld wonderfully, transforming your dessert into a dreamy treat.
Step 6: Serve and Enjoy
Once chilled, bring your dazzling dessert cups out, and watch the smiles appear! Each individual cup is ready to be savored. It’s the perfect finishing touch to a lovely meal or a delightful treat just for you!
Serving Suggestions & Pairings
These Red Velvet Dessert Cups are fabulous served with fresh berries or a scoop of ice cream. You could even drizzle a chocolate or cream cheese glaze over the top for an extra touch of decadence. Pair these with a smooth cup of coffee or a glass of sparkling wine for a luxe experience!
Storage & Leftovers Guide
If you have leftovers — though I doubt you will — simply cover the dessert cups tightly with plastic wrap. They will keep in the refrigerator for up to 2 days. The flavors will continue to develop, making each subsequent serving just a tad more delightful.
Kitchen Wisdom & Success Tips
- If you’re short on time, the boxed red velvet mix is your best friend; it ensures consistent results without the hassle.
- Make sure your vanilla mousse is light and fluffy; this creates the perfect contrast to the denser red velvet.
- Consider letting the layered dessert sit overnight if you want to amplify the flavors even more!
Flavor Variations & Adaptations
Feel free to customize your dessert cups! Add layers of crushed cookies or fruit for extra texture. If vanilla isn’t your thing, you can easily substitute it with chocolate mousse or even a zesty lemon cream for something refreshing!
Reader Questions & Solutions
-
Can I use a gluten-free cake mix?
Yes, absolutely! A gluten-free cake mix will work well to achieve the same great texture. -
How do I make my mousse fluffier?
If your mousse seems heavy, try folding in whipped cream to lighten it up further. -
Can I prepare this in advance?
Yes! These dessert cups can be assembled the day before and stored in the fridge until you’re ready to serve. -
What if I don’t have clear glasses?
Any small serving dishes or bowls will work! The key is in the layering; just ensure they’re transparent enough to show off your beautiful creation. -
How can I prevent the cake from getting soggy?
Be sure to let your cake cool completely before layering, and try to keep each cake layer as thin as possible to minimize sogginess.
Wrapping Up
I hope this recipe for Red Velvet Dessert Cups inspires you to whip up something special today. Desserts are not just sweet endings; they are celebratory moments, bringing people together around a shared joy. So grab your ingredients, let your creativity fly, and let the magic unfold. Enjoy each delicious bite and remember — it’s the love you put into cooking that makes it truly special! Happy baking, friends!
PrintRed Velvet Dessert Cups
A visually stunning and delicious dessert featuring layers of red velvet cake and vanilla mousse.
- Prep Time: 20 minutes
- Cook Time: 10 minutes
- Total Time: 30 minutes
- Yield: 4-6 servings
- Category: Dessert
- Method: Chilling, Layering
- Cuisine: American
- Diet: Vegetarian
Ingredients
- Red velvet cake (leftover or boxed)
- Vanilla mousse
- Clear glasses or jars for serving
Instructions
- Prepare the red velvet cake according to package instructions or cut leftover cake into small pieces.
- Whip up the vanilla mousse in a separate bowl until smooth and fluffy.
- Begin layering your dessert with a spoonful of red velvet cake pieces in the glasses or jars.
- Repeat this process, dolloping layers of vanilla mousse over the cake until filled.
- Cover with plastic wrap and chill in the refrigerator for at least an hour.
- Serve chilled and enjoy the delightful layers!
Notes
Consider adding layers of crushed cookies or fruit for extra texture. If desired, substitute vanilla mousse with chocolate or lemon cream.
Nutrition
- Serving Size: 1 serving
- Calories: 300
- Sugar: 22g
- Sodium: 300mg
- Fat: 15g
- Saturated Fat: 5g
- Unsaturated Fat: 8g
- Trans Fat: 0g
- Carbohydrates: 38g
- Fiber: 1g
- Protein: 5g
- Cholesterol: 30mg