
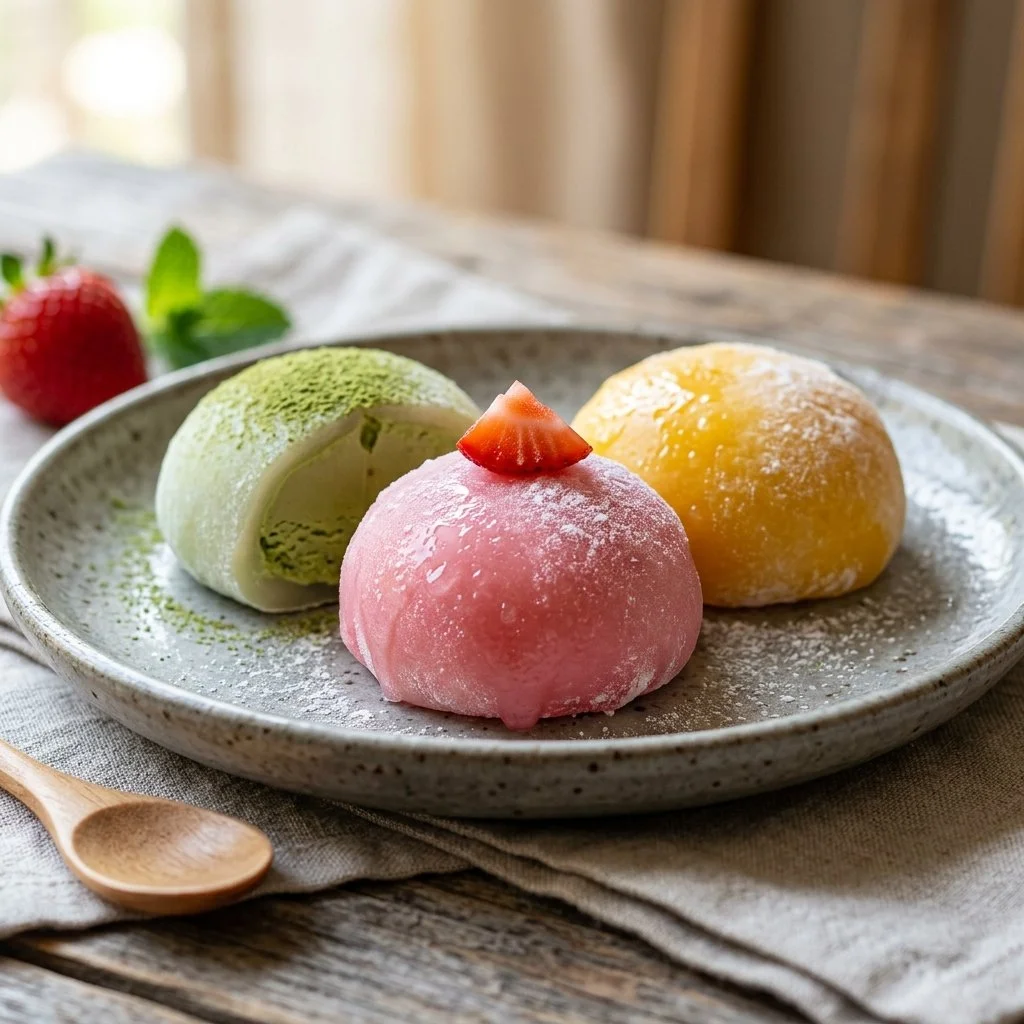
There’s something magical about biting into a piece of mochi ice cream. It’s that delightful combination of the chewy, subtly sweet mochi exterior enveloping a creamy, cool ice cream interior that can make anyone smile. It reminds me of warm summer evenings spent gathering with family and friends, eagerly waiting for the next surprise flavor to emerge from the depths of the freezer. As you taste, you’re transported to Japan, where this delightful treat originated, blending tradition and modern sweetness in each bite.
Recipe Timing
- Prep Duration: 15 minutes
- Active Cooking: 5 minutes
- Total Duration: 2 hours (including freezing time)
- Portion Size: 6-8 servings
- Complexity: Simple
Nutritional Recipe
- Calories per portion: 150
- Protein: 2g
- Carbs: 30g
- Fats: 3g
- Fiber: 1g
- Sugars: 10g
- Sodium: 10mg
Why You’ll Love This Mochi Ice Cream
This mochi ice cream recipe is not just about a sweet treat; it’s an experience. The soft, chewy texture of the mochi combined with the rich, vibrant flavors of your favorite ice cream makes each bite a sweet journey. Plus, it’s no-bake, making it a fantastic option for gatherings, parties, or just indulging in a little self-care on a quiet night in. Plus, you can customize the flavors to match the season, your mood, or whatever deliciousness you have on hand!
The Complete Cooking Journey
Creating mochi ice cream is a delightful journey that starts with basic ingredients you might already have in your pantry. This recipe may seem a bit tricky at first, but trust me – you’ll have fun experimenting and flavor-matching. Don’t shy away because the steps are entirely manageable and rewarding!
Ingredients:
- 1 cup sweet rice flour (mochi flour)
- 1 cup water
- 3 tablespoons sugar
- Cornstarch (for dusting)
- Ice cream of your choice
Method:
### Step 1: Mix the Mochi Ingredients
In a microwave-safe bowl, mix sweet rice flour, sugar, and water until smooth. This simple blend forms the foundation of your mochi.
### Step 2: Microwave the Mixture
Cover the bowl with plastic wrap and microwave for 1 minute. This cooks the mixture, making it transform into that sticky, lovely mochi consistency.
### Step 3: Stir and Return to the Microwave
Stir the mixture, cover again, and microwave for another minute. This ensures an even texture throughout.
### Step 4: A Final Touch of Heat
Stir once more and microwave for an additional 30 seconds. The mixture should be glossy and slightly firm when you’re done.
### Step 5: Prepare a Dusting Surface
Dust a clean surface with cornstarch, pour the mochi mixture onto it, and let it cool slightly. The cornstarch prevents sticking, making your assembly much easier.
### Step 6: Shape the Mochi
Divide the mochi into small pieces and flatten each piece with your hands. Aim for about 3 inches in diameter.
### Step 7: Fill with Ice Cream
Place a small scoop of ice cream in the center of each piece and carefully wrap the mochi around it. This is where the magic happens!
### Step 8: Seal and Shape
Pinch to seal and shape into a ball. Make sure there are no gaps where the ice cream could escape.
### Step 9: Freeze Until Solid
Dust with cornstarch as needed and freeze until solid. This sets your creation in place for that perfect texture.
Serving Suggestions & Pairings
When it comes to enjoying your mochi ice cream, think of amusement ***– serving it up with fresh fruit, or a drizzle of chocolate or matcha sauce not only elevates the presentation but the experience as well. A handful of crunchy nuts or a sprinkle of sesame seeds can add delightful texture. Pair it with green tea or a light sparkling drink for a refreshing dessert experience!
Storage & Leftovers Guide
Mochi ice cream can be kept in the freezer for up to two weeks. Make sure to wrap each piece in parchment paper or keep them in an airtight container dusted with cornstarch to maintain that delightful chewiness. If they become a bit too hard after freezing, let them sit at room temperature for a few minutes before enjoying.
Kitchen Wisdom & Success Tips
- Don’t skip on the cornstarch! It’s essential for handling your mochi and preventing it from sticking to your hands and the surface.
- Experiment with flavors! Matcha, red bean, or even cookie dough ice cream can take your mochi ice cream to another level.
- If you have leftover mochi, consider slicing it in half or quarters to create bite-sized pieces. They can be a fun addition to dessert platters!
Flavor Variations & Adaptations
Feel free to experiment! Try blending fruit purees into the ice cream for refreshing, fruity options. For the mochi, consider adding a touch of matcha powder for a subtly bitter contrast, or even cocoa powder for a chocolatey twist. The possibilities are truly endless!
Reader Questions & Solutions
- What if the mochi dough is too sticky? Adding a bit more cornstarch during handling can help manage the stickiness.
- Can I use gluten-free ice cream? Absolutely! Vanilla almond milk ice cream or coconut cream-based options work wonderfully.
- Is there a vegan version? Yes! Replace regular ice cream with any coconut milk-based or almond milk-based ice cream.
- How can I make the mochi less sweet? Simply reduce the sugar to taste in the mochi mixture.
- Can these be made ahead of time? Yes! Prepare the mochi ice cream up to two weeks in advance and store it in the freezer until you’re ready to enjoy.
Wrapping Up
Your homemade mochi ice cream is not just a treat; it’s a journey of creativity and flavor exploration. Whether it’s for a quiet afternoon treat or a lively gathering, your personalized mochi creations are sure to impress and delight. So gather those ingredients, unleash your inner ice cream artist, and enjoy every scrumptious bite! Happy cooking!
PrintMochi Ice Cream
A delightful combination of chewy mochi and creamy ice cream, perfect for summer evenings or gatherings.
- Prep Time: 15 minutes
- Cook Time: 5 minutes
- Total Time: 120 minutes
- Yield: 6-8 servings 1x
- Category: Dessert
- Method: No-Bake
- Cuisine: Japanese
- Diet: Vegetarian
Ingredients
- 1 cup sweet rice flour (mochi flour)
- 1 cup water
- 3 tablespoons sugar
- Cornstarch (for dusting)
- Ice cream of your choice
Instructions
- Mix the mochi ingredients in a microwave-safe bowl until smooth.
- Cover the bowl with plastic wrap and microwave for 1 minute.
- Stir the mixture, cover again, and microwave for another minute.
- Stir once more and microwave for an additional 30 seconds.
- Dust a clean surface with cornstarch, pour the mochi mixture onto it, and let it cool slightly.
- Divide the mochi into small pieces and flatten each piece with your hands.
- Place a small scoop of ice cream in the center of each piece and carefully wrap the mochi around it.
- Pinch to seal and shape into a ball.
- Freeze until solid, dusting with cornstarch as needed.
Notes
Wrap each mochi ice cream in parchment paper or store in an airtight container dusted with cornstarch to maintain texture.
Nutrition
- Serving Size: 1 serving
- Calories: 150
- Sugar: 10g
- Sodium: 10mg
- Fat: 3g
- Saturated Fat: 1g
- Unsaturated Fat: 2g
- Trans Fat: 0g
- Carbohydrates: 30g
- Fiber: 1g
- Protein: 2g
- Cholesterol: 0mg