
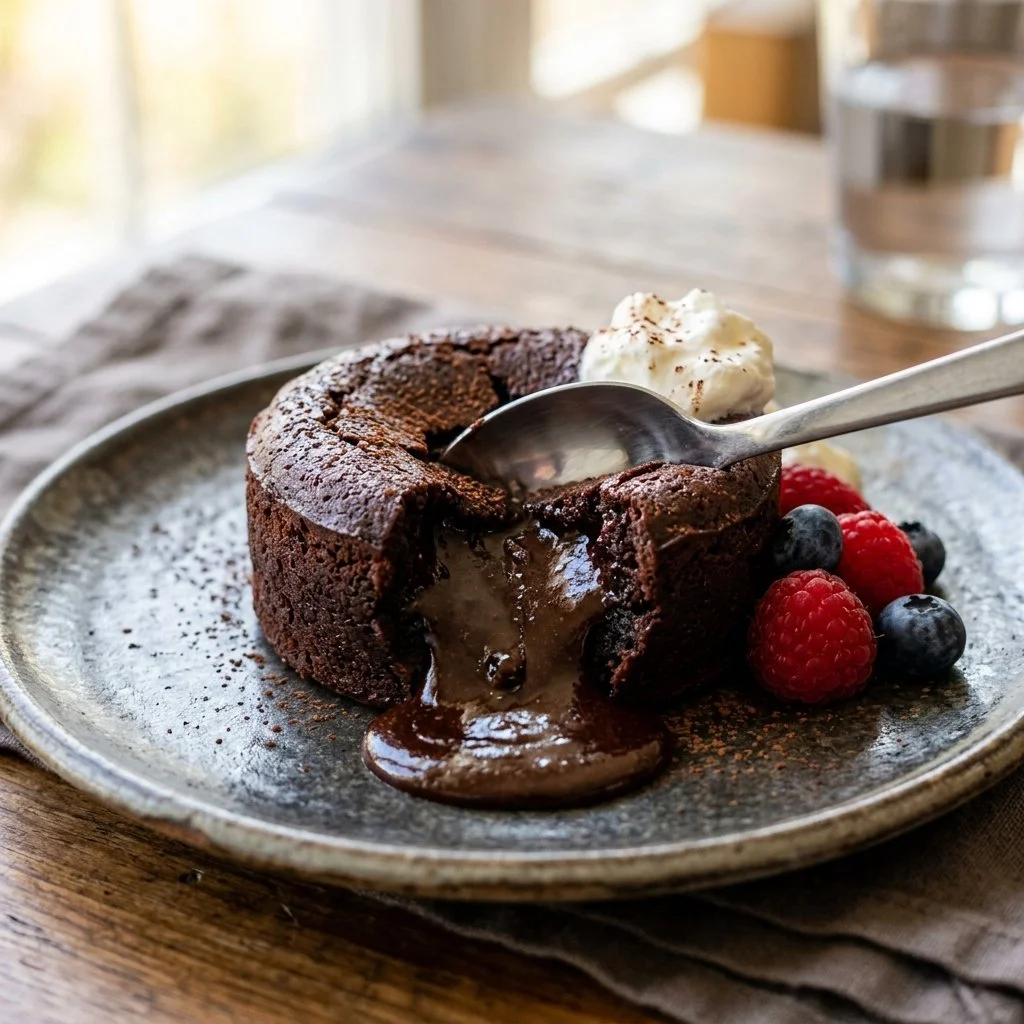
There’s something undeniably magical about the moment a chocolate lava cake is served. Imagine, if you will, a warm, dark chocolate dessert that beckons you to dive in with its enticing aroma. As the spoon breaks the delicate crust of the cake, a cascade of molten chocolate oozes out, ready to envelop your senses in a rich, velvety embrace. This isn’t just a dessert; it’s an experience, a memory waiting to be made around the dinner table.
A few years back, I was hosting a dinner party for some dear friends. As the evening unfolded, laughter filled the air, complemented by the delightful clinks of wine glasses and the scents of savory dishes. But it was the chocolate lava cake that truly stole the spotlight. One by one, my friends took their first bite, and the collective "wow" that followed was a moment I will cherish forever. That’s the beauty of this dessert; it turns an ordinary evening into something special, a sweet ending that lingers in your heart.
Recipe Timing
- Prep Duration: 15 minutes
- Active Cooking: 14 minutes
- Total Duration: 29 minutes
- Portion Size: Serves 4
- Complexity: Simple
Nutritional Recipe
- Calories per portion: Approximately 360
- Protein: 6g per serving
- Carbs: 34g per serving
- Fats: 22g per serving
- Fiber: 2g per serving
- Sugars: 20g per serving
- Sodium: 150mg per serving
Why You’ll Love This Chocolate Lava Cake
Who doesn’t love a dessert that feels like a warm hug? This chocolate lava cake delivers a perfect balance of a baked exterior and a gooey center that’s nothing short of heavenly. It’s simple enough to whip up for a cozy evening but elegant enough to impress guests. Plus, it’s naturally gluten-free if you omit the flour or use an alternative, making it a versatile choice for many diets. Each bite is rich, satisfying, and utterly indulgent—what’s not to love?
The Complete Cooking Journey
Creating this chocolate lava cake is as joyous as indulging in it. From the first step of melting butter and chocolate together—releasing that irresistible, sweet aroma—to the last moment when you invert the ramekins and watch in anticipation for the warm chocolate to flow out. This process is not just about cooking; it’s an emotional ride filled with fun, laughter, and, above all, an irresistible sweet treat waiting for you to enjoy.
Ingredients:
- 1/2 cup (1 stick) unsalted butter
- 1 cup dark chocolate chips
- 2 large eggs
- 2 large egg yolks
- 1/4 cup sugar
- 2 tablespoons all-purpose flour
- 1 teaspoon vanilla extract
- Pinch of salt
Method:
Step 1: Preheat the Oven
Preheat the oven to 425°F (220°C). This high temperature is key to achieving that perfect lava center. It’ll create the optimal environment for your cakes to bake quickly.
Step 2: Prepare the Ramekins
Grease four ramekins with butter and dust the insides with cocoa powder. This step not only helps prevent sticking but also adds a touch of chocolate flavor to the cake!
Step 3: Melt Butter and Chocolate
In a microwave-safe bowl, melt the butter and chocolate chips together until smooth. Stir halfway through to ensure even melting. The mixture should be silky and glossy—it’s time to indulge in a little taste of the chocolate bliss!
Step 4: Whisk Eggs and Sugar
In a separate bowl, whisk together the eggs, egg yolks, and sugar until thick and pale. This step introduces air into the mixture, creating a light texture for the cake.
Step 5: Combine Chocolate Mixture
Stir in the melted chocolate mixture into the egg mixture. The combination should be unified and decadent, creating a beautiful chocolate base that’s hard to resist.
Step 6: Fold in Dry Ingredients
Gently fold in the flour, vanilla, and a pinch of salt until just combined. Be careful not to overmix; we want to keep that airy texture intact.
Step 7: Divide the Batter
Divide the batter among the prepared ramekins. Fill them to about three-quarters full, allowing enough space for the cakes to rise without overflowing.
Step 8: Bake to Perfection
Bake for about 12-14 minutes until the edges are firm but the center is soft. This is a critical step; a minute too long can turn your molten center into a well-done cake!
Step 9: Cool and Serve
Let the cakes cool for 1 minute, then invert onto plates. Serve warm to ensure that gooey center flows out beautifully when cut—this is the moment of truth!
Serving Suggestions & Pairings
These chocolate lava cakes shine on their own, but if you want to elevate them even further, consider serving them with a scoop of vanilla ice cream or a dollop of freshly whipped cream. A sprinkle of sea salt or a drizzle of caramel sauce can add a delightful contrast to the sweetness. Don’t forget a few fresh raspberries or strawberries for a dash of color and tartness to balance the richness!
Storage & Leftovers Guide
While these lava cakes are best served fresh, if you find yourself with leftovers (which is unlikely!), you can store them in the fridge for up to 2 days. To reheat, pop them in the microwave for about 20 seconds until warm—just be cautious not to overheat, as you want to preserve that gooey center.
Kitchen Wisdom & Success Tips
- Use Good Quality Chocolate: The better the chocolate, the better your cake will taste. Opt for at least 60% cocoa dark chocolate for a rich flavor.
- Don’t Overbake: Keep an eye on your cakes; they need that molten middle. It can be tricky, but timing is everything here.
- Prep Ahead: You can make the batter ahead of time and store it in the fridge in the ramekins, baking just before you’re ready to serve.
Flavor Variations & Adaptations
Feel free to add a twist to your chocolate lava cake! Consider mixing in some espresso powder to enhance the chocolate flavor or adding a teaspoon of orange zest for a refreshing citrus note. If you want a little crunch, toss in some chopped nuts or chocolate chunks for added texture.
Reader Questions & Solutions
-
What should I do if my cakes overflow in the oven?
- This can happen if the ramekins are too full. Next time, fill them about halfway to allow room for rising.
-
Can I use milk chocolate instead of dark chocolate?
- Absolutely! However, milk chocolate will yield a sweeter cake. Adjust the sugar down if you prefer a less sweet treat.
-
What can I substitute for eggs in this recipe?
- You can use 1/4 cup of unsweetened applesauce or a flaxseed meal (1 tablespoon mixed with 2.5 tablespoons of water) as a vegan alternative.
-
How can I ensure my cakes come out of the ramekin nicely?
- Proper greasing and dusting with cocoa powder are key. Let them cool for just a minute after baking before inverting.
-
Is there a way to make this dessert lower in calories?
- Consider using less sugar or a sugar substitute, and you can swap some of the butter for applesauce for a lighter option. Keep in mind this may alter the texture slightly.
Wrapping Up
Indulging in a homemade chocolate lava cake is more than just satisfying a sweet tooth; it’s about creating moments and memories that linger long after the dessert plates have been cleared. Whether you’re celebrating a special occasion or simply treating yourself after a long day, this recipe invites you to slow down and savor life one delicious bite at a time. So, preheat your oven, gather your ingredients, and embark on this delicious journey that promises to delight you and anyone lucky enough to share it with you. Happy baking!