Growing up, my grandmother had a knack for transforming simple gatherings into treasured moments with her baked delights. Among her masterpieces was the strawberry cheesecake that graced our family celebrations. With each silky slice, the blend of creamy texture and bright strawberry notes would enchant our taste buds and bring smiles all around. It’s more than just a dessert; it’s a memory, a connection—a shared love for good food. Today, I want to share that love with you through this easy yet spectacular strawberry cheesecake recipe that will surely elicit round after round of compliments.
Recipe Timing
- Prep Duration: 20 minutes
- Active Cooking: 1 hour
- Total Duration: 5 hours 20 minutes (includes cooling and chilling)
- Portion Size: serves 10
- Complexity: Simple
Nutritional Recipe
- Calories per portion: 380
- Protein: 8g per serving
- Carbs: 34g per serving
- Fats: 26g per serving
- Fiber: 1g per serving
- Sugars: 18g per serving
- Sodium: 320mg per serving
Why You’ll Love This Strawberry Cheesecake Recipe
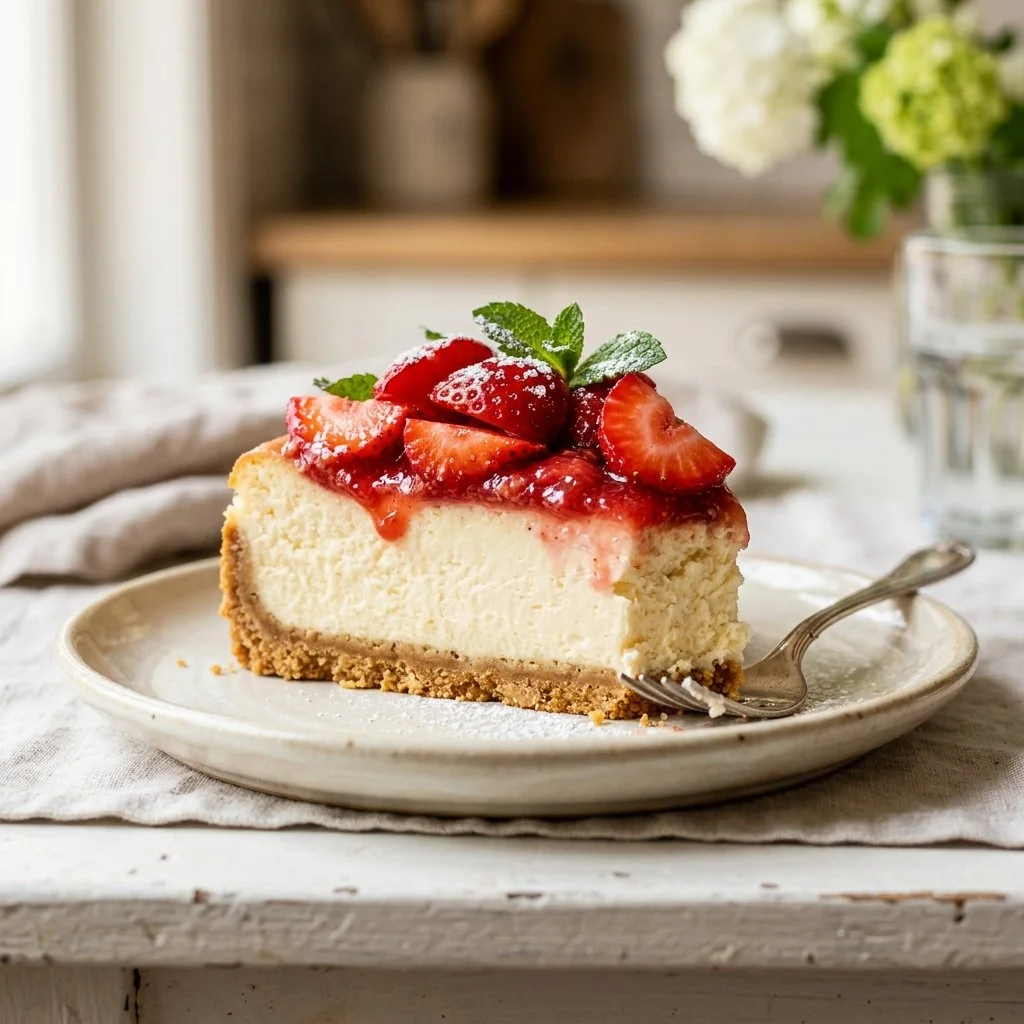
This strawberry cheesecake is a delightful balance of creamy cheese and the naturally sweetness of strawberries. It’s surprisingly simple to make, yet it feels luxurious enough for special occasions. The graham cracker crust adds a perfect crunch that complements the smooth filling. It’s adaptable too! Whether you’re having a summer picnic or hosting a dinner party, this cheesecake will be the star of the table. Plus, it can be made a day ahead, giving you extra time to enjoy your guests.
The Complete Cooking Journey
Baking a cheesecake is like sculpting a work of art. From the buttery graham cracker crust to the rich, velvety filling, each step leads you closer to create a masterpiece. You’ll start by building a solid foundation of crumbly crust, then craft the creamy filling that is destined to be adorned with fresh strawberries. Patience is key as it bakes and cools, ensuring the perfect setting for your cheesecake’s finale.
Ingredients:
- 1 ½ cups graham cracker crumbs
- ½ cup sugar
- ½ cup butter, melted
- 3 (8 oz) packages cream cheese, softened
- 1 cup sugar
- 1 tsp vanilla extract
- 3 large eggs
- 1 cup sour cream
- 1 cup fresh strawberries, sliced
- ¼ cup strawberry sauce (optional)
Method:
Step 1: Preheat the Oven
Preheat your oven to 325°F (160°C). This is essential for achieving a perfectly baked cheesecake.
Step 2: Prepare the Crust
In a bowl, combine graham cracker crumbs, ½ cup sugar, and melted butter. Press this mixture firmly into the bottom of a 9-inch springform pan to form a sturdy, crumbly crust for your cheesecake.
Step 3: Beat the Cream Cheese
In a large mixing bowl, beat the cream cheese until smooth. Gradually add in 1 cup sugar and vanilla, beating until the mixture is well combined and creamy.
Step 4: Add the Eggs
Add the eggs one at a time, making sure to beat well after each addition. This creates a lovely, airy filling that holds its shape beautifully as it bakes.
Step 5: Mix in the Sour Cream
Stir in sour cream until the mixture is smooth and creamy. This adds richness and a slight tang that complements the sweetness beautifully. Pour the cream cheese mixture over the prepared crust.
Step 6: Bake the Cheesecake
Bake in the preheated oven for 50-60 minutes until the center is set but still slightly jiggly. This ensures a creamy texture instead of a dry one!
Step 7: Cool and Chill
Allow the cheesecake to cool to room temperature, then refrigerate for at least 4 hours (or overnight) to let the flavors meld and the texture set.
Step 8: Garnish and Serve
Before serving, top your cheesecake with fresh strawberries and drizzle with strawberry sauce, if desired. This adds a burst of color and fresh flavor.
Serving Suggestions & Pairings
Pair this decadent cheesecake with a dollop of whipped cream and a sprig of mint for a refreshing touch. Serve alongside a cup of coffee or tea to round off a perfect meal. It’s also delightful with a scoop of vanilla ice cream if you’re feeling indulgent!
Storage & Leftovers Guide
Store any leftover cheesecake in an airtight container in the refrigerator for up to 5 days. It can also be frozen for up to 2 months; just make sure to wrap it tightly in plastic wrap followed by aluminum foil.
Kitchen Wisdom & Success Tips
- Room Temp Ingredients: Ensure your cream cheese and eggs are at room temperature to achieve a smooth filling.
- Don’t Overmix: When adding eggs, mix just until incorporated to prevent incorporating too much air, which can result in cracks.
- Water Bath: For an extra creamy cheesecake, consider baking your cheesecake in a water bath. It helps regulate the temperature and keeps the moisture level high.
Flavor Variations & Adaptations
Feel free to swap in your favorite berries! Raspberries, blueberries, or even a mixed berry topping can add a unique twist. For a chocolate lover’s version, fold in melted chocolate into the cream cheese mixture or drizzle on top before serving.
Reader Questions & Solutions
-
Q: My cheesecake cracked! What went wrong?
- A: Cracks can form from overmixing or baking at too high a temperature. For a smooth surface, make sure to mix the batter just until combined and consider adding a water bath for gentle cooking.
-
Q: Can I use low-fat cream cheese?
- A: Yes, you can, but keep in mind that the texture might be slightly different. It may not be as rich and creamy but still delicious!
-
Q: What can I do if my cheesecake doesn’t set?
- A: If it’s too jiggly after baking, it may need more time. Remember, it will firm up as it cools in the fridge.
-
Q: Can I make this cheesecake gluten-free?
- A: Absolutely! Just use gluten-free graham crackers for the crust.
-
Q: How long should I chill the cheesecake before serving?
- A: For the best texture, refrigerate for at least 4 hours, but overnight is even better!
Wrapping Up
This strawberry cheesecake is more than a dessert—it’s a heartfelt creation that brings people together. Whether you’re celebrating a birthday, an anniversary, or simply enjoying a sunny afternoon, this cheesecake is sure to impress. I hope you try it and find the joy in every creamy bite, just like I did all those years ago with my grandmother’s enchanting recipe. Happy baking!
PrintStrawberry Cheesecake
A delightful balance of creamy cheese and sweet strawberries that brings joy to any occasion.
- Prep Time: 20 minutes
- Cook Time: 60 minutes
- Total Time: 320 minutes
- Yield: 10 servings 1x
- Category: Dessert
- Method: Baking
- Cuisine: American
- Diet: Vegetarian
Ingredients
- 1 ½ cups graham cracker crumbs
- ½ cup sugar
- ½ cup butter, melted
- 3 (8 oz) packages cream cheese, softened
- 1 cup sugar
- 1 tsp vanilla extract
- 3 large eggs
- 1 cup sour cream
- 1 cup fresh strawberries, sliced
- ¼ cup strawberry sauce (optional)
Instructions
- Preheat the oven to 325°F (160°C).
- Combine graham cracker crumbs, ½ cup sugar, and melted butter; press into a 9-inch springform pan.
- Beat the cream cheese until smooth; gradually add in 1 cup sugar and vanilla until creamy.
- Add the eggs one at a time, beating well after each addition.
- Stir in sour cream until smooth; pour the mixture over the crust.
- Bake for 50-60 minutes until the center is slightly jiggly.
- Cool to room temperature, then refrigerate for at least 4 hours.
- Top with fresh strawberries and drizzle with strawberry sauce before serving.
Notes
Ensure cream cheese and eggs are at room temperature for a smooth filling. Consider using a water bath for extra creaminess.
Nutrition
- Serving Size: 1 serving
- Calories: 380
- Sugar: 18g
- Sodium: 320mg
- Fat: 26g
- Saturated Fat: 15g
- Unsaturated Fat: 6g
- Trans Fat: 0g
- Carbohydrates: 34g
- Fiber: 1g
- Protein: 8g
- Cholesterol: 100mg