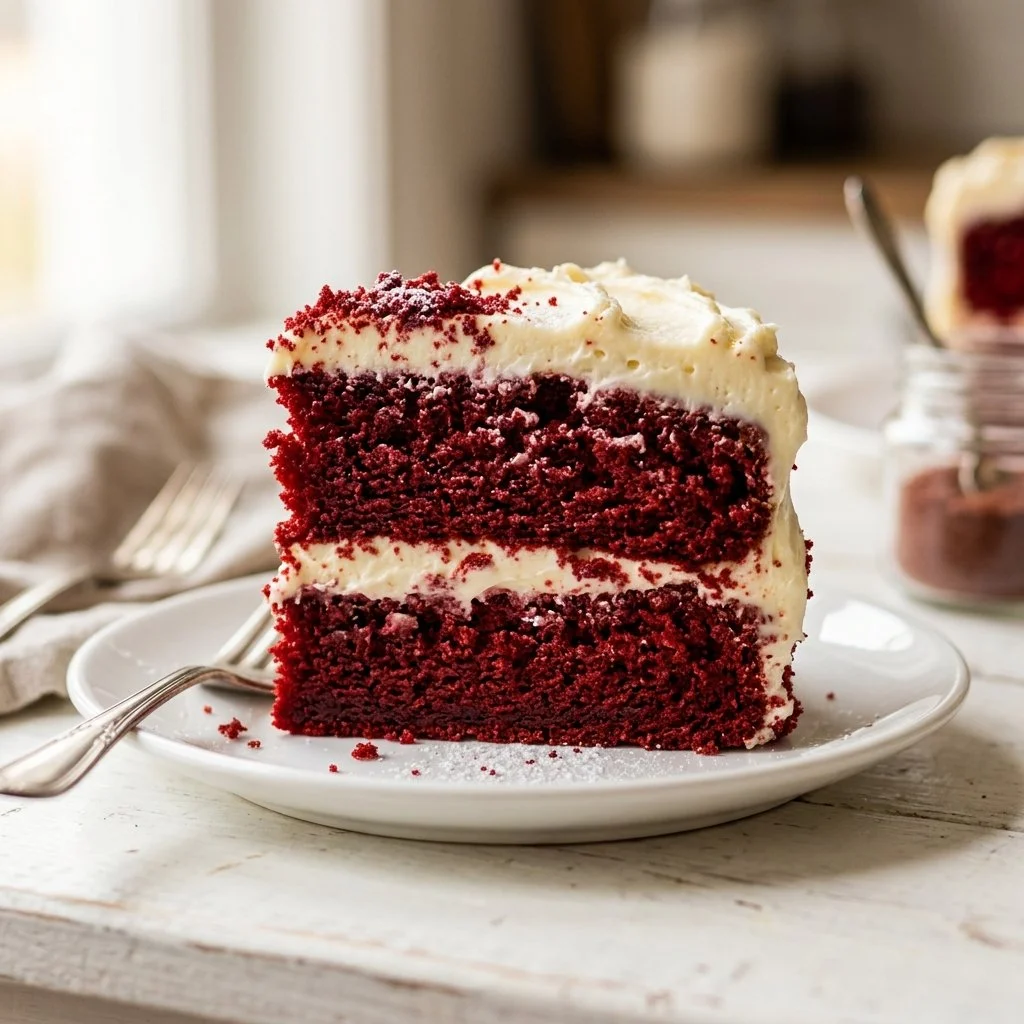
There’s something undeniably magical about cakes that evoke memories, especially when it comes to the iconic red velvet cake. I can still picture the first time I encountered this vibrant dessert at a friend’s birthday party. The deep crimson hue, adorned with billowy cream cheese frosting, made my heart skip a beat. I was instantly captivated—not just by the delicious layers but by the joy it brought to the celebration. Each slice was a partnership of sweet with a subtle tang, wrapped in nostalgia. Today, I’m excited to share my own rendition of this beloved classic—an undertaking that invites love, laughter, and, of course, indulgence into our home kitchens.
Recipe Timing
- Prep Duration: 15 minutes
- Active Cooking: 30 minutes
- Total Duration: 1 hour
- Portion Size: Serves 12
- Complexity: Simple
Nutritional Recipe
- Calories per portion: Approximately 350
- Protein: 4g
- Carbs: 50g
- Fats: 15g
- Fiber: 1g
- Sugars: 25g
- Sodium: 300mg
Why You’ll Love This Red Velvet Cake Recipe
What makes this red velvet cake so special? It’s not just the dazzling color or the rich flavor profile; it’s the combination of soft, moist crumbs that melt in your mouth. The gentle balance of cocoa and vanilla gives it a unique depth, while the tangy cream cheese frosting takes it to a whole new level. Plus, this recipe is straightforward enough even for novice bakers, allowing you to create something stunning without much fuss. Imagine surprising your loved ones with a gorgeous cake that not only turns heads but tickles taste buds too!
The Complete Cooking Journey
Baking a cake can feel daunting to some, but I assure you, it’s an art that anyone can master with practice. This red velvet cake is a perfect starting point. Not only does it come together quickly, but the process of mixing, pouring, and baking is incredibly satisfying. You’ll find joy in seeing your creation rise to perfection in the oven. Let’s take this baking journey together!
Ingredients:
- 2 1/2 cups all-purpose flour
- 1 1/2 cups sugar
- 1 teaspoon baking powder
- 1 teaspoon baking soda
- 1 teaspoon salt
- 1 cup vegetable oil
- 1 cup buttermilk, room temperature
- 2 large eggs, room temperature
- 2 tablespoons red food coloring
- 1 teaspoon vanilla extract
- 1 teaspoon white vinegar
Method:
Step 1: Preheat the Oven
Preheat your oven to 350°F (175°C). Grease and flour two 9-inch round cake pans to ensure your cakes come out effortlessly.
Step 2: Sift the Dry Ingredients
In a large bowl, sift together the all-purpose flour, sugar, baking powder, baking soda, and salt. This step aerates the flour and ensures a light, fluffy texture.
Step 3: Whisk the Wet Ingredients
In another bowl, whisk together the vegetable oil, buttermilk, eggs, red food coloring, vanilla extract, and white vinegar. The vibrant red will mesmerize you as you mix!
Step 4: Combine Wet and Dry
Gradually add the wet ingredients to the dry ingredients. Mix until just combined; be cautious not to overmix as this will yield a tougher cake.
Step 5: Divide the Batter
Evenly divide the beautiful batter between your prepared cake pans. Spread it out gently with a spatula to ensure it bakes evenly.
Step 6: Bake to Perfection
Bake for 25-30 minutes. Keep an eye on them; you want a toothpick inserted into the center to come out clean. That’s your cue to take them out!
Step 7: Cool Before Frosting
Let the cakes cool in the pans for 10 minutes then transfer to wire racks to cool completely. This avoids the frosting melting and helps achieve a neat finish.
Serving Suggestions & Pairings
Slice into this luscious cake and serve it alongside a steaming cup of coffee or a cold glass of milk. It also pairs wonderfully with fresh berries or a scoop of vanilla ice cream, elevating your dessert experience.
Storage & Leftovers Guide
If you have any leftovers (which is rare!), store your red velvet cake in an airtight container at room temperature for up to 3 days. For longer shelf life, refrigerate for up to a week. You can also freeze the unfrosted layers by wrapping them tightly in plastic wrap for up to 3 months. Simply thaw before frosting.
Kitchen Wisdom & Success Tips
- Ensure your ingredients are at room temperature for better mixing.
- Don’t skip the vinegar; it reacts with the baking soda for that quintessential fluffiness.
- Always check for doneness a few minutes early—every oven is a bit different.
Flavor Variations & Adaptations
Want a twist? Try adding a hint of espresso powder to enhance the chocolate flavor. Or switch up the frosting with a chocolate ganache for a decadent touch. You could even make this cake gluten-free by using a 1:1 gluten-free flour blend.
Reader Questions & Solutions
-
Can I substitute the buttermilk?
Absolutely! Substitute with an equal amount of milk mixed with a tablespoon of vinegar or lemon juice. -
Why is my cake not as red as I expected?
The quality of the food coloring matters. Make sure to use gel food coloring for the best vibrant results! -
Can I make this recipe as cupcakes?
Yes! This batter makes about 24 cupcakes, baking at 350°F for 18-20 minutes. -
What if I don’t have vegetable oil?
You can use canola oil or melted coconut oil as alternates. -
Why did my cake sink in the middle?
This can happen if the oven door was opened too soon or if the batter was overmixed. Make sure to keep the oven door closed!
Wrapping Up
With each bite of this red velvet cake, you are not just enjoying a dessert; you’re creating moments and memories. Gather your friends and family, share slices, and indulge in the warmth this cake brings. So, roll up your sleeves, channel your inner baker, and let this vibrant dessert enchant your kitchen. Happy baking!
PrintRed Velvet Cake
A classic red velvet cake that combines soft, moist layers with tangy cream cheese frosting, perfect for celebrations.
- Prep Time: 15 minutes
- Cook Time: 30 minutes
- Total Time: 45 minutes
- Yield: 12 servings 1x
- Category: Dessert
- Method: Baking
- Cuisine: American
- Diet: Vegetarian
Ingredients
- 2 1/2 cups all-purpose flour
- 1 1/2 cups sugar
- 1 teaspoon baking powder
- 1 teaspoon baking soda
- 1 teaspoon salt
- 1 cup vegetable oil
- 1 cup buttermilk, room temperature
- 2 large eggs, room temperature
- 2 tablespoons red food coloring
- 1 teaspoon vanilla extract
- 1 teaspoon white vinegar
Instructions
- Preheat your oven to 350°F (175°C). Grease and flour two 9-inch round cake pans.
- Sift together the all-purpose flour, sugar, baking powder, baking soda, and salt in a large bowl.
- Whisk together the vegetable oil, buttermilk, eggs, red food coloring, vanilla extract, and white vinegar in another bowl.
- Combine the wet ingredients with the dry ingredients. Mix until just combined.
- Divide the batter evenly between the prepared cake pans.
- Bake for 25-30 minutes until a toothpick comes out clean.
- Cool in the pans for 10 minutes, then transfer to wire racks to cool completely.
Notes
Ensure your ingredients are at room temperature for best results. You can also make this as cupcakes!
Nutrition
- Serving Size: 1 slice
- Calories: 350
- Sugar: 25g
- Sodium: 300mg
- Fat: 15g
- Saturated Fat: 2g
- Unsaturated Fat: 8g
- Trans Fat: 0g
- Carbohydrates: 50g
- Fiber: 1g
- Protein: 4g
- Cholesterol: 30mg