It was a balmy summer evening when I found myself traipsing through a nearby orchard. The sun was beginning to dip below the horizon, splashing orange and pink hues across the sky, and the air was sweet with the fragrance of ripe fruit. A basket tucked under my arm, I wandered among the rows of trees until I stumbled upon a cherry tree weighed down by its juicy, crimson jewels. I couldn’t resist plucking a handful, their glossy surface glistening in the late afternoon sun, each bite bursting with sweet-tart flavor. It was in that moment that the idea of homemade cherry pie filling unfolded in my mind—a joy that I couldn’t wait to share.
## Recipe Timing
- Prep Duration: 15 minutes
- Active Cooking: 10 minutes
- Total Duration: 25 minutes
- Portion Size: About 2 cups
- Complexity: Simple
## Nutritional Recipe
- Calories per portion: Approximately 120
- Protein: 1g
- Carbs: 30g
- Fats: 0g
- Fiber: 1g
- Sugars: 22g
- Sodium: 5mg
## Why You’ll Love This Homemade Cherry Pie Filling
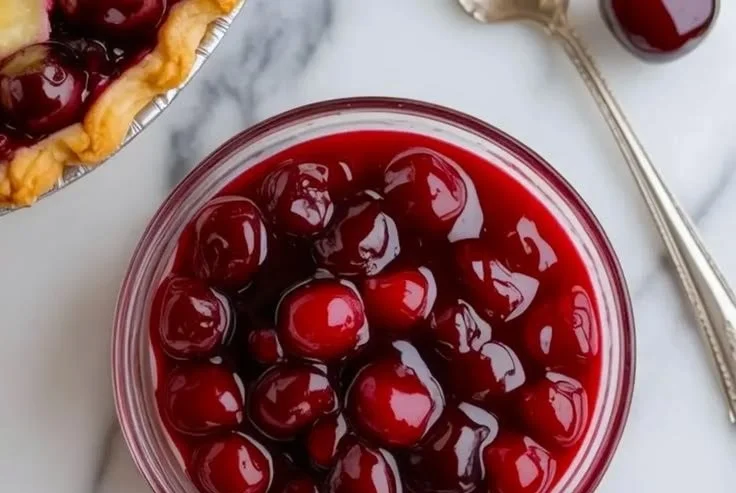
This homemade cherry pie filling isn’t just about simplicity; it’s about capturing the heart of summer in a jar. With fresh cherries, a touch of sugar, and a hint of vanilla, it brings a vibrant flavor profile to your desserts. Whether you’re crafting a classic cherry pie, slathering it over yogurt, or using it to elevate a scoop of vanilla ice cream, this filling is the perfect way to savor those lazy summer days all year round.
## The Complete Cooking Journey
From the moment you pit those luscious cherries to the glossy finish of your cherry filling, each step transforms your kitchen into a haven of sweet nostalgia. There’s something deeply satisfying about making your own filling—a connection to tradition and a celebration of seasonal produce.
## Ingredients:
- Fresh cherries
- Sugar
- Cornstarch
- Lemon juice
- Vanilla extract
- Salt
## Method:
### Step 1: Prepare the Cherries
Pit and chop the fresh cherries. This step is therapeutic—there’s something oddly satisfying about watching the vibrant red fruit transition from whole to ready-to-cook. Make sure to save any juice that might run off; it adds an extra depth of flavor!
### Step 2: Combine Ingredients
In a saucepan over medium heat, combine the cherries, sugar, and lemon juice. The sweet aroma will start to fill your kitchen, hinting at the deliciousness to come.
### Step 3: Create a Slurry
In a small bowl, mix the cornstarch with a little water to create a slurry, then add it to the saucepan. This will help thicken the filling, giving it that perfect pie-filling consistency we all love.
### Step 4: Stir and Cook
Stir continuously until the mixture thickens and becomes glossy. You’ll witness the cherries transform as they bubble away, becoming luscious and syrupy.
### Step 5: Flavor It Up
Remove from heat and add the vanilla extract and a pinch of salt. This step elevates the flavors even more, balancing the sweetness with a hint of warmth.
### Step 6: Cool Before Using
Let cool before using in pies or other desserts. Patience is a virtue here; you want that pretty cherry filling to set up perfectly.
## Serving Suggestions & Pairings
This delicious cherry filling is versatile enough for all your dessert needs! Pair it with a buttery crust in a pie, use it as a topping for pancakes, or mix it into a creamy cheesecake. You can also layer it in parfaits with whipped cream and granola for a delightful treat any time of day.
## Storage & Leftovers Guide
If you’re lucky enough to have leftovers, store the cherry filling in an airtight container in the refrigerator for up to one week. You can also freeze it for up to six months—just make sure it’s cooled completely before freezing for the best texture!
## Kitchen Wisdom & Success Tips
- Ensure your cherries are ripe for the best flavor. Overripe cherries can turn your filling mushy, so aim for that perfect balance.
- Adjust the sugar to your preference, especially if your cherries are particularly sweet or tart.
- If you’re out of cornstarch, you can substitute with flour, although it may slightly alter the texture.
## Flavor Variations & Adaptations
Feeling adventurous? Try adding spices like cinnamon or nutmeg for a warm, cozy flavor. You can also blend in a splash of bourbon or almond extract for an unexpected twist!
## Reader Questions & Solutions
-
Can I use frozen cherries instead of fresh? Absolutely! Just make sure to thaw and drain them well before cooking.
-
How do I avoid a runny cherry filling? The key is the cornstarch slurry. Make sure to stir until it thickens, and allow it to cook for a few additional minutes.
-
What if I don’t have lemon juice? A splash of apple cider vinegar or even a bit of orange juice can work as a substitute.
-
Can I can this filling? Yes! Just follow proper canning procedures to ensure it’s preserved safely.
-
How can I sweeten it without sugar? Try using honey or maple syrup as a natural alternative, adjusting to taste.
## Wrapping Up
With this homemade cherry pie filling, you’re not just bringing delicious flavor to your desserts—you’re also creating lasting memories in the kitchen. There’s magic in the process, and as the sweet aroma swirls around your space, you’ll feel the joy that comes with crafting something from scratch. So grab those fresh cherries and let’s get cooking—your taste buds will thank you!
PrintHomemade Cherry Pie Filling

Capture the heart of summer with this homemade cherry pie filling made with fresh cherries, sugar, and vanilla.
- Prep Time: 15
- Cook Time: 10
- Total Time: 25
- Yield: About 2 cups 1x
- Category: Dessert
- Method: Stovetop
- Cuisine: American
- Diet: Vegetarian
Ingredients
- 2 cups Fresh cherries
- 1 cup Sugar
- 2 tablespoons Cornstarch
- 1 tablespoon Lemon juice
- 1 teaspoon Vanilla extract
- 1/4 teaspoon Salt
Instructions
- Prepare the cherries: Pit and chop the fresh cherries, saving any juice that runs off.
- Combine in a saucepan over medium heat the cherries, sugar, and lemon juice.
- Create a slurry by mixing cornstarch with a little water in a small bowl, then add it to the saucepan.
- Stir continuously until the mixture thickens and becomes glossy.
- Remove from heat, add the vanilla extract and salt.
- Let cool before using in pies or other desserts.
Notes
Ensure the cherries are ripe for the best flavor and adjust sugar based on their sweetness.
Nutrition
- Serving Size: 1/4 cup
- Calories: 120
- Sugar: 22g
- Sodium: 5mg
- Fat: 0g
- Saturated Fat: 0g
- Unsaturated Fat: 0g
- Trans Fat: 0g
- Carbohydrates: 30g
- Fiber: 1g
- Protein: 1g
- Cholesterol: 0mg