There’s just something magical about the combination of coffee and ice cream. Picture a warm summer evening, the air filled with laughter, and the enticing aroma of freshly brewed coffee wafting through your kitchen. As the daylight fades, you scoop out a bowl of homemade coffee ice cream, the cool creaminess melting ever so slightly under the warm sun. Each bite offers a perfect blend of rich coffee flavor and sweet, velvety cream that takes you right back to a cozy café in your favorite city. This sensory delight is not just a dessert; it’s a little moment of joy you can create for yourself and your loved ones.
Recipe Timing
- Prep Duration: 15 minutes
- Active Cooking: 25 minutes (churning time varies)
- Total Duration: 4 hours and 15 minutes (including freezing)
- Portion Size: Approximately 6 servings
- Complexity: Simple
Nutritional Recipe
- Calories per portion: 370
- Protein: 4g
- Carbs: 31g
- Fats: 27g
- Fiber: 0g
- Sugars: 25g
- Sodium: 65mg
Why You’ll Love This Coffee Ice Cream
Not only is this coffee ice cream incredibly easy to make at home, but it also offers an indulgent escape from the everyday routine. With just a handful of ingredients, you’ll create a creamy, dreamy dessert that strikes the perfect balance between the intense flavor of coffee and the sweetness of sugar. Plus, making ice cream from scratch gives you complete control over the flavors. Whether you crave a classic taste or wish to explore unique variations, this recipe serves as a wonderful base to get creative. And, let’s be honest — there’s something immensely satisfying about serving up a bowl of homemade goodness to family and friends!
The Complete Cooking Journey
Creating this coffee ice cream is a delightful process that fills your kitchen with wonderful scents while offering the promise of a delicious treat at the end. You’ll be whisking together cream and milk, infusing it with the earthy richness of coffee, and then churning it into the softest, dreamiest ice cream you can imagine. Let’s dive into the ingredients and method that will see you through this delightful treat!
Ingredients:
- 2 cups heavy cream
- 1 cup whole milk
- 3/4 cup granulated sugar
- 1 tablespoon vanilla extract
- 1 cup brewed coffee, cooled
- 1/2 teaspoon salt
Method:
Step 1: Whisking the Base
In a medium bowl, combine the heavy cream, whole milk, granulated sugar, vanilla extract, cooled brewed coffee, and salt. Use a whisk to mix everything together until the sugar is completely dissolved, and the mixture feels light and frothy.
Step 2: Churning to Perfection
Pour the coffee cream mixture into your ice cream maker. Follow the manufacturer’s instructions for churning until it reaches a soft-serve consistency. Trust me, the aroma at this stage will be absolutely mesmerizing!
Step 3: Freezing for Firmness
Transfer the churned ice cream into a lidded container. Make sure to pack it down gently to avoid ice crystals forming. Freeze for at least four hours or until it has set into a firm, scoopable texture.
Step 4: Serving Your Creation
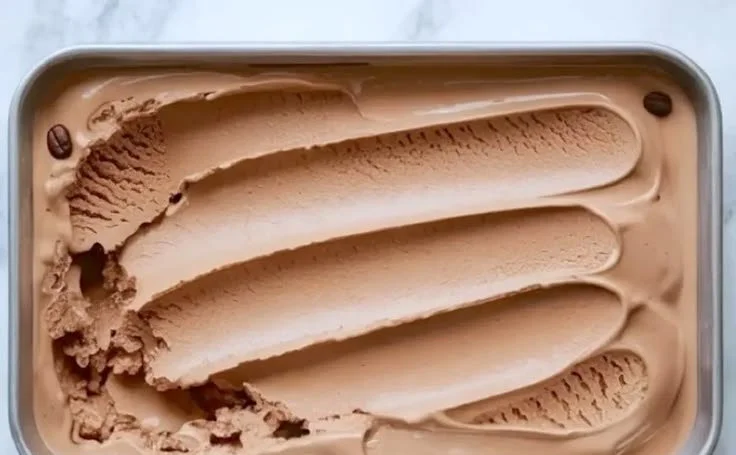
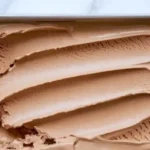
Once the ice cream is beautifully set, scoop it into bowls or cones, and savor each velvety mouthful of creamy coffee goodness. It’s a sweet ending to any day, whether enjoyed on its own or paired with a slice of chocolate cake.
Serving Suggestions & Pairings
Serve this coffee ice cream alongside a warm chocolate brownie for a heavenly combination, or top it with chocolate syrup and crushed nuts for added texture. It pairs wonderfully with a shot of espresso for that true café-style experience right at home!
Storage & Leftovers Guide
Store any leftovers in an airtight container in the freezer for up to two weeks. To prevent ice crystals from forming, ensure the container is tightly sealed. When you’re ready to indulge again, simply scoop out what you need, allowing it to sit at room temperature for a few minutes before serving for easier scooping.
Kitchen Wisdom & Success Tips
- Chill Your Ice Cream Maker: Make sure your ice cream maker bowl is fully frozen for at least 24 hours before churning to ensure the best texture.
- Sweeten to Taste: Feel free to adjust the sugar levels to suit your preference, especially if you’re a fan of stronger coffee flavors.
- Serve with Flair: Garnish with coffee beans or chocolate shavings for an elegant presentation.
Flavor Variations & Adaptations
Feeling adventurous? Consider adding a pinch of cinnamon or a splash of coffee liqueur for a delightful twist. For a mocha version, swirl in some chocolate fudge sauce as you transfer the ice cream to the container.
Reader Questions & Solutions
-
Can I use decaf coffee?
Absolutely! Decaf will work perfectly if you want to enjoy the flavor without the caffeine. -
What if I don’t have an ice cream maker?
No worries! Pour the mixture into a shallow dish and freeze, stirring every 30 minutes for a few hours until it reaches your desired consistency. -
Is it possible to make this dairy-free?
Yes! Substitute the heavy cream and whole milk with full-fat coconut milk or almond milk, and use a dairy-free creamer for flavor. -
How can I prevent ice crystals in my ice cream?
Make sure to churn the mixture thoroughly and store it in an airtight container. A solid freeze is also key! -
Can I add mix-ins like chocolate chips or nuts?
Certainly! Just fold them in during the last few minutes of churning for an exciting crunch!
Wrapping Up
This creamy coffee ice cream is more than just a dessert; it’s an experience, a piece of love you can share with those you hold dear. With easy steps and simple ingredients, you’re just a few hours away from elevating any summer day or sweetening up an evening gathering. So go ahead, roll up your sleeves, and let’s make some unforgettable coffee ice cream memories!
PrintHomemade Coffee Ice Cream
A creamy and dreamy dessert that combines rich coffee flavor and sweet, velvety cream, perfect for warm summer evenings.
- Prep Time: 15 minutes
- Cook Time: 25 minutes
- Total Time: 255 minutes
- Yield: 6 servings 1x
- Category: Dessert
- Method: Churning
- Cuisine: American
- Diet: Vegetarian
Ingredients
- 2 cups heavy cream
- 1 cup whole milk
- 3/4 cup granulated sugar
- 1 tablespoon vanilla extract
- 1 cup brewed coffee, cooled
- 1/2 teaspoon salt
Instructions
- Whisking the Base: In a medium bowl, combine the heavy cream, whole milk, granulated sugar, vanilla extract, cooled brewed coffee, and salt. Use a whisk to mix everything together until the sugar is completely dissolved, and the mixture feels light and frothy.
- Churning to Perfection: Pour the coffee cream mixture into your ice cream maker. Follow the manufacturer’s instructions for churning until it reaches a soft-serve consistency.
- Freezing for Firmness: Transfer the churned ice cream into a lidded container. Make sure to pack it down gently to avoid ice crystals forming. Freeze for at least four hours or until it has set into a firm, scoopable texture.
- Serving Your Creation: Once the ice cream is beautifully set, scoop it into bowls or cones, and savor each velvety mouthful of creamy coffee goodness.
Notes
Serve this coffee ice cream alongside a warm chocolate brownie or top with chocolate syrup and crushed nuts for a delightful treat.
Nutrition
- Serving Size: 1 serving
- Calories: 370
- Sugar: 25g
- Sodium: 65mg
- Fat: 27g
- Saturated Fat: 16g
- Unsaturated Fat: 11g
- Trans Fat: 0g
- Carbohydrates: 31g
- Fiber: 0g
- Protein: 4g
- Cholesterol: 80mg