There’s something incredibly comforting about homemade bread. The warmth, the aroma wafting through your kitchen, and the moment you tear into that fluffy goodness are experiences that linger long after the last bite. I’ve always found joy in baking, especially when it comes to creating rolls that can turn any meal into something special. And today, I’m excited to share my recipe for Soft and Buttery Homemade Rolls that are perfect for any occasion — be it a family dinner or a cozy gathering with friends.
Recipe Timing
- Prep Duration: 15 minutes
- Active Cooking: 25 minutes
- Total Duration: 1 hour 30 minutes (including resting time)
- Portion Size: 12 rolls
- Complexity: Simple
Nutritional Recipe
- Calories per portion: 170
- Protein: 4g
- Carbs: 26g
- Fats: 6g
- Fiber: 1g
- Sugars: 3g
- Sodium: 150mg
Why You’ll Love This Soft and Buttery Homemade Rolls
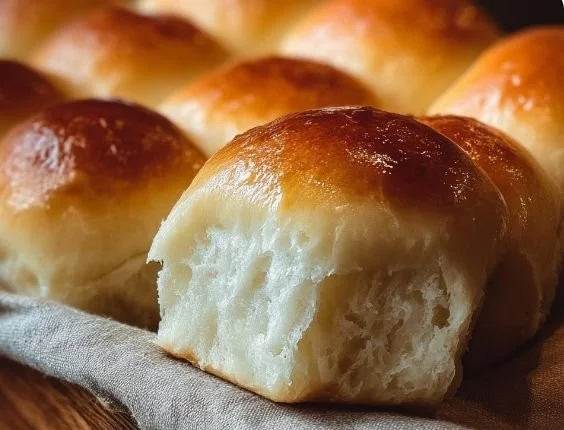
Imagine biting into a soft, pillowy roll that melts in your mouth! These rolls are not just delicious; they add a touch of home to your dinner table. They pair wonderfully with soups, stews, or simply slathered with butter. Plus, the joy of making them from scratch will fill your heart and home with warmth.
The Complete Cooking Journey
From mixing the warm, fluffy dough to enjoying the fresh-out-of-the-oven aroma, this cooking journey is as delightful as the final product. I still remember the first time I baked these rolls — the dough was a bit sticky, but as it rose, it turned into something magical that my whole family adored. Let’s dive into this blissful baking adventure!
Ingredients:
- 4 cups all-purpose flour
- 1 packet instant yeast (about 2.25 teaspoons)
- 1/4 cup granulated sugar
- 1 teaspoon salt
- 1 cup warm milk (make sure it’s Halal-certified)
- 1/4 cup unsalted butter (melted)
- 2 large eggs (beaten)
- Additional melted butter (for brushing, optional)
Method:
### Step 1: Mixing the Dry Ingredients
In a large mixing bowl, whisk together the all-purpose flour, instant yeast, sugar, and salt. This step is vital; it ensures that the yeast is evenly distributed throughout the flour, resulting in perfectly risen rolls.
### Step 2: Combining Wet Ingredients
In a separate bowl, mix the warm milk, melted butter, and beaten eggs. Make sure the milk is warm and not hot, as this will activate the yeast without killing it!
### Step 3: Forming the Dough
Pour the wet mixture into the bowl with dry ingredients. Stir until a dough begins to form. It might look sticky and shaggy, but that’s exactly what you want.
### Step 4: Kneading to Perfection
Turn the dough out onto a floured surface and knead it for about 8-10 minutes until it becomes smooth and elastic. This is where the magic happens! Kneading develops the gluten, which gives the rolls their wonderful texture.
### Step 5: First Rise
Place the kneaded dough into a greased bowl, cover it with a clean kitchen towel, and let it rise in a warm place for about 1 hour or until it doubles in size. Patience here pays off!
### Step 6: Shaping the Rolls
Once the dough has risen, punch it down gently and turn it onto a floured surface. Divide the dough into 12 equal pieces and shape them into balls. Place them in a greased baking dish, making sure they are touching slightly.
### Step 7: Second Rise
Cover the shaped rolls with a towel and let them rise for another 30 minutes until they puff up. This step is crucial for achieving that fluffy, airy texture.
### Step 8: Baking
Preheat your oven to 375°F (190°C). Once the rolls have risen, brush them with the additional melted butter for a golden finish and bake for 20-25 minutes until they are golden brown and sound hollow when tapped.
### Step 9: Cooling and Serving
Remove the rolls from the oven and allow them to cool slightly before serving. The best part? You’ll want to dive into them while they are still warm!
Serving Suggestions & Pairings
These Soft and Buttery Homemade Rolls are incredibly versatile. Serve them warm with a dollop of butter or alongside a hearty soup. They are also fantastic for making mini sandwiches or just enjoyed with a good spread of jam for breakfast!
Storage & Leftovers Guide
If you have any rolls left (which is rare!), store them in an airtight container at room temperature for up to two days. For longer storage, freeze them in a zip-top bag for up to three months. To reheat, simply wrap in foil and warm in a 350°F (175°C) oven for about 10 minutes.
Kitchen Wisdom & Success Tips
- If your dough is too sticky, add a little more flour, but be careful not to over-flour.
- A warm environment helps with rising; consider placing the dough in an oven warmed to the lowest setting, then turned off.
- If you’re short on time, let the dough rise in the refrigerator overnight for even better flavor.
Flavor Variations & Adaptations
Feeling adventurous? Try adding herbs like rosemary or garlic for savory rolls. For a touch of sweetness, mix in a handful of dried cranberries or chocolate chips. The possibilities are endless!
Reader Questions & Solutions
-
My rolls didn’t rise; what went wrong?
Check your yeast’s expiration date and ensure the milk wasn’t too hot. -
Can I use whole wheat flour instead?
Yes, just adjust the liquid slightly, as whole wheat flour absorbs more moisture. -
What if I don’t have instant yeast?
You can use active dry yeast but make sure to proof it first. -
How can I make these vegan?
Substitute the butter with plant-based butter and the eggs with flax eggs. -
Can I make the dough ahead of time?
Absolutely! You can refrigerate it after shaping for up to 24 hours before the second rise and baking.
Wrapping Up
Baking these Soft and Buttery Homemade Rolls not only provides delicious, warm bread but also creates cherished memories in the kitchen. I encourage you to try this recipe and enjoy the simple pleasure of homemade goodness. Happy baking!
PrintSoft and Buttery Homemade Rolls

Deliciously soft and buttery homemade rolls that are perfect for any meal, adding a touch of home to your dinner table.
- Prep Time: 15 minutes
- Cook Time: 25 minutes
- Total Time: 90 minutes
- Yield: 12 rolls 1x
- Category: Bread
- Method: Baking
- Cuisine: American
- Diet: Vegetarian
Ingredients
- 4 cups all-purpose flour
- 1 packet instant yeast (about 2.25 teaspoons)
- 1/4 cup granulated sugar
- 1 teaspoon salt
- 1 cup warm milk (make sure it’s Halal-certified)
- 1/4 cup unsalted butter (melted)
- 2 large eggs (beaten)
- Additional melted butter (for brushing, optional)
Instructions
- Mix the dry ingredients: In a large mixing bowl, whisk together the all-purpose flour, instant yeast, sugar, and salt.
- Combine the wet ingredients: In a separate bowl, mix the warm milk, melted butter, and beaten eggs.
- Pour the wet mixture into the bowl with dry ingredients. Stir until a dough begins to form.
- Turn the dough out onto a floured surface and knead for about 8-10 minutes until smooth and elastic.
- Place the kneaded dough into a greased bowl, cover it, and let it rise for about 1 hour or until it doubles in size.
- Punch down the dough gently and turn it onto a floured surface. Divide into 12 pieces and shape into balls.
- Cover the shaped rolls with a towel and let them rise for another 30 minutes.
- Preheat your oven to 375°F (190°C). Brush the rolls with melted butter and bake for 20-25 minutes.
- Remove the rolls from the oven and allow them to cool slightly before serving.
Notes
If your dough is too sticky, add a little more flour. For better flavor, let the dough rise in the refrigerator overnight.
Nutrition
- Serving Size: 1 roll
- Calories: 170
- Sugar: 3g
- Sodium: 150mg
- Fat: 6g
- Saturated Fat: 3g
- Unsaturated Fat: 3g
- Trans Fat: 0g
- Carbohydrates: 26g
- Fiber: 1g
- Protein: 4g
- Cholesterol: 30mg