What is it about an Oreo crust that instantly transports us back to our childhood? Perhaps it’s the memory of sharing a slice of rich cheesecake with friends or the thrill of seeing that dark, crumbly base emerge from the fridge, ready to be filled with our favorite treats. As a passionate home cook, I’ve always found that the simplest ingredients often lead to the most memorable experiences in the kitchen. Today, I’m excited to guide you through the magic of creating your own Oreo crust, a versatile base that pairs perfectly with any dessert!
## Recipe Timing
- Prep Duration: 10 minutes
- Active Cooking: 5 minutes
- Total Duration: 40 minutes (including chilling)
- Portion Size: Serves 8
- Complexity: Simple
## Nutritional Recipe
- Calories per portion: Approximately 150
- Protein: 1g per serving
- Carbs: 18g per serving
- Fats: 8g per serving
- Fiber: 1g per serving
- Sugars: 7g per serving
- Sodium: 100mg per serving
## Why You’ll Love This Oreo Crust
What’s not to love? This Oreo crust is not only sinfully delicious but also incredibly easy to prepare. Crush a few cookies, mix in some melted butter, and you’ll have a perfectly sweet, crunchy base that provides a delightful contrast to creamy fillings. It captures the iconic taste of Oreo in a way that has guests coming back for seconds—and maybe even thirds! Whether you’re making a classic cheesecake, a luscious chocolate mousse, or even a fruity tart, this crust adds a touch of nostalgia to any dessert.
## The Complete Cooking Journey
Let’s embark on this simple yet satisfying journey to create your very own Oreo crust. It’s so easy that even those new to the kitchen will enjoy making it. The aroma of crushed Oreos, combined with the rich smell of melted butter, will have you inspired to bake something delightful in no time!
## Ingredients:
- Oreo cookies
- Melted butter
## Method:
### Step 1: Crush the Cookies into Fine Crumbs
Grab your favorite Oreo cookies and place them into a food processor. Blend them until they’re fine crumbs, or you can put them in a Ziploc bag and crush them with a rolling pin if you prefer a more hands-on approach. Either way, you want those cookies to be small enough to form a cohesive crust.
### Step 2: Mix with Melted Butter
In a bowl, pour the crushed Oreo cookies and then drizzle the melted butter over them. Using a spatula or your hands, mix everything together until the cookie crumbs are evenly coated in buttery goodness.
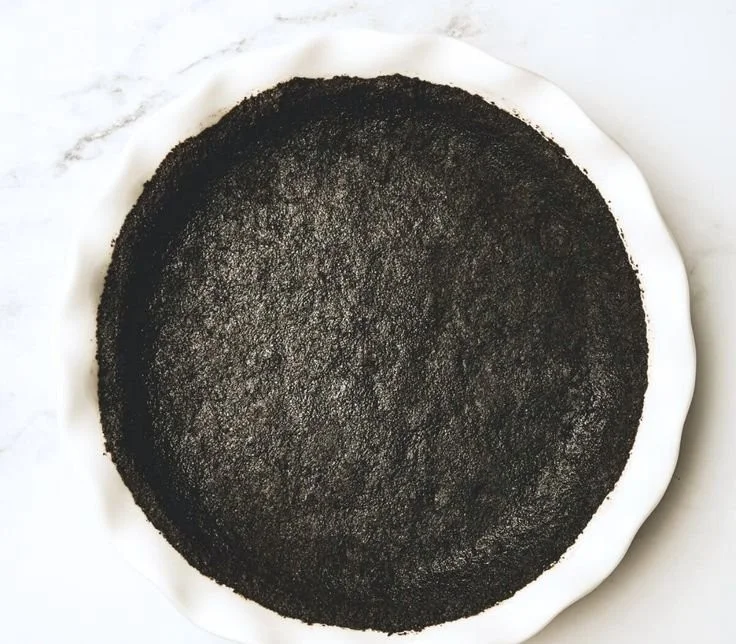
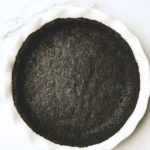
### Step 3: Form the Crust
Take a pie dish or cheesecake pan and press the cookie mixture firmly into the bottom and up the sides to create an even layer. The more you press, the firmer your crust will hold its shape when filled!
### Step 4: Chill to Set
Place your crust in the refrigerator and let it chill for at least 30 minutes. This step is crucial as it allows the butter to firm up, creating a stable base for your dessert.
## Serving Suggestions & Pairings
This Oreo crust pairs wonderfully with a variety of fillings! Try it with classic cheesecake, a rich chocolate ganache, or even a no-bake strawberry cheesecake. Top with whipped cream or fresh fruit for an added touch. You can never go wrong with an Oreo crust!
## Storage & Leftovers Guide
If you find yourself with leftover crust, you can store it in an airtight container in the fridge for up to 3 days. If you’ve made a full dessert, it will typically last in the fridge for 5-7 days—if it lasts that long!
## Kitchen Wisdom & Success Tips
- Make sure your melted butter is not too hot; otherwise, it could make the crumbs soggy.
- If you want to elevate your crust, consider adding a pinch of salt to the mixture for a sweet-salty flavor.
- Press the crust down firmly to avoid crumbling when serving.
## Flavor Variations & Adaptations
Feeling adventurous? Try mixing in some crushed nuts or coconut flakes for added texture, or substitute half of the Oreo cookies with graham crackers for a different flavor profile. You could also use gluten-free Oreo cookies if you need a gluten-free option, making this delicious crust accessible to everyone!
## Reader Questions & Solutions
-
Q: Can I use other cookies for this crust?
A: Absolutely! You can use any chocolate sandwich cookie or even graham crackers for a different flavor. -
Q: How can I make my crust firmer?
A: Ensure you’re using enough butter and pressing the crumbs down tightly. Chilling the crust longer can also help! -
Q: What do I do if the crust crumbles when I serve it?
A: Try chilling it longer before cutting. This helps firm it up. -
Q: Can I freeze my crust?
A: Yes! You can freeze it for up to a month. Just wrap it tightly in plastic wrap. -
Q: What is the best way to fill the crust?
A: Pour your filling gently into the crust, allowing it to settle. A smooth spatula helps.
## Wrapping Up
Creating your own Oreo crust is a celebration of simple ingredients and joyful baking experiences. Imagine serving your family and friends a dessert with a rich, chocolatey base that you’ve made from scratch. It’s all in the little moments—those shared bites and praises that make it all worthwhile. So, gather your Oreos and butter and dive into this delicious adventure. You’ve got this! Happy baking!
PrintOreo Crust
A simple and delicious Oreo crust that serves as the perfect base for various desserts.
- Prep Time: 10 minutes
- Cook Time: 5 minutes
- Total Time: 40 minutes
- Yield: 8 servings 1x
- Category: Dessert
- Method: Chilling
- Cuisine: American
- Diet: Vegetarian
Ingredients
- 2 cups Oreo cookies
- 1/2 cup melted butter
Instructions
- Crush the Oreo cookies into fine crumbs.
- Mix the crushed cookies with melted butter until well combined.
- Form the crust by pressing the mixture into a pie dish or cheesecake pan.
- Chill the crust in the refrigerator for at least 30 minutes to set.
Notes
For a sweeter flavor, consider adding a pinch of salt to the mixture. This crust can be frozen for up to a month.
Nutrition
- Serving Size: 1 slice
- Calories: 150
- Sugar: 7g
- Sodium: 100mg
- Fat: 8g
- Saturated Fat: 5g
- Unsaturated Fat: 3g
- Trans Fat: 0g
- Carbohydrates: 18g
- Fiber: 1g
- Protein: 1g
- Cholesterol: 15mg