
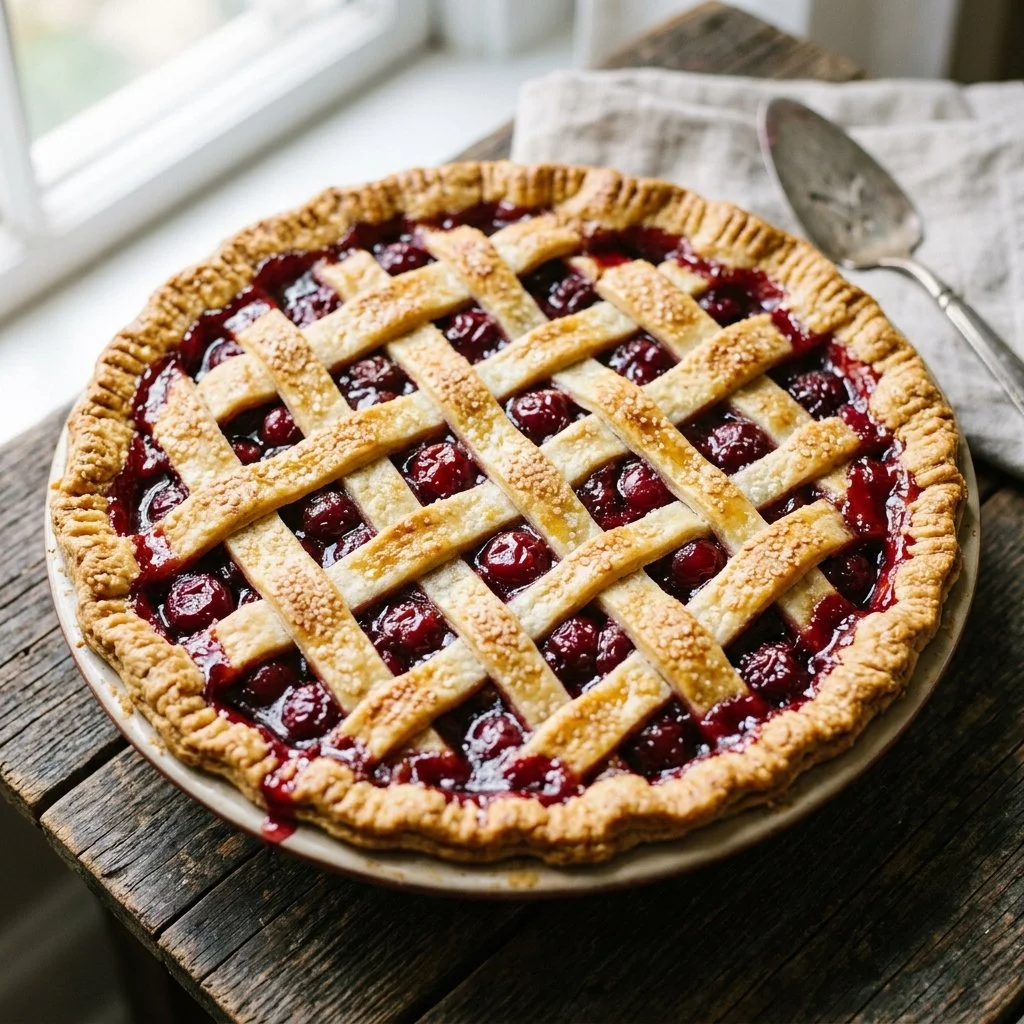
There’s something enchanting about the anticipation that fills the air when a cherry pie is baking in the oven. It evokes memories of family gatherings, summer picnics, and warm, laughter-filled kitchens. I can still recall the scent of freshly baked cherry pie wafting through my grandmother’s house—each slice a little piece of nostalgia, rich with stories of summer days spent picking cherries, bright red hands stained with juice, and giggly attempts to steal the last piece before dinner.
The beauty of cherry pie lies not just in its flavor, but in the comfort it brings. The tangy sweetness of cherries, the buttery, flaky crust, and the satisfaction of creating something delightful from scratch—each element draws you in, making it one of those recipes you return to time and again. So, grab your apron and let’s dive in to make a cherry pie that will not only fill your home with warmth but also your heart with joy.
Recipe Timing
- Prep Duration: 15 minutes
- Active Cooking: 50 minutes
- Total Duration: 1 hour 5 minutes
- Portion Size: Serves 8
- Complexity: Simple
Nutritional Recipe
- Calories per portion: 250
- Protein: 2g
- Carbs: 40g
- Fats: 10g
- Fiber: 2g
- Sugars: 20g
- Sodium: 200mg
Why You’ll Love This Cherry Pie
This cherry pie is truly a celebration of flavors! With that luscious filling bursting with sweet and tart cherry goodness, it’s perfectly balanced by a golden, flaky crust that comes with an inviting crunch with every slice. Whether served warm with a scoop of vanilla ice cream or enjoyed plain, this quintessential dessert finds its way into the hearts of everyone around the table. It’s a foolproof dessert for both seasoned bakers and those just finding their footing in the kitchen.
The Complete Cooking Journey
Now, let’s take a moment to prepare ourselves for the culinary adventure ahead! This recipe guides you step by step through creating a cherry pie that’s simply irresistible. Gather your ingredients, centralize your space, and immerse yourself in the joy of baking a pie that your loved ones will cherish.
Ingredients:
- 2 cups fresh or frozen cherries
- 1 cup granulated sugar
- 2 tablespoons cornstarch
- 1 tablespoon lemon juice
- 1 teaspoon vanilla extract
- 1 tablespoon butter
- 1 pie crust
Method:
Step 1: Preheat the Oven
Preheat the oven to 425°F (220°C). A hot oven is key to getting that perfect golden crust.
Step 2: Mix the Filling
In a bowl, combine the fresh or frozen cherries, sugar, cornstarch, lemon juice, and vanilla extract. Give it a good stir, so the cherries are well coated. The sweet and tart aromas will quickly rise to greet you.
Step 3: Prepare the Pie Crust
Place your bottom pie crust in a pie pan, ensuring it fits snugly against the edges. Pour the cherry mixture into it, allowing all those juices to spread evenly.
Step 4: Add Butter
Dot the filling with small pieces of butter. This is what will add a lovely richness as it bakes!
Step 5: Seal the Pie
Cover with the top pie crust, sealing the edges by crimping them together. Be sure to make some slits in the top crust. These little vents let the steam escape and prevent the filling from bubbling over.
Step 6: Bake to Perfection
Bake your pie in the preheated oven for 45-50 minutes, or until the crust is golden brown and the filling is bubbly. It’s the moment when your kitchen fills with that sweet aroma, signaling it’s almost time to indulge!
Step 7: Cool and Serve
Once baked, let the pie cool before serving. This waiting period allows the filling to set up beautifully, making it easier to slice.
Serving Suggestions & Pairings
Cherry pie shines with a dollop of whipped cream or a scoop of vanilla ice cream, providing a delightful contrast to its rich fruitiness. It makes for an enchanting dessert at summer gatherings or simply a cozy slice of nostalgia on a quiet evening at home.
Storage & Leftovers Guide
Store any leftover pie covered at room temperature for up to 2 days. For longer storage, you can refrigerate it for up to a week or freeze it (sliced or whole) for up to 3 months. Just be sure to wrap it tightly in plastic wrap to prevent freezer burn.
Kitchen Wisdom & Success Tips
- Ensure your cherries are pitted and the juices are incorporated well for a smooth consistency.
- For an extra touch, mix in a pinch of cinnamon or almond extract with the fruit filling for a delightful flavor twist.
- If you’re using frozen cherries, let them thaw and drain excess liquid before mixing to prevent a soggy crust.
Flavor Variations & Adaptations
- Consider mixing different fruits like blueberries or raspberries for a mixed berry pie.
- Want a bit of crunch? Add a streusel topping of oats and brown sugar instead of a top crust.
Reader Questions & Solutions
- What if my pie crust cracks? Don’t worry! Simply press the cracks back together and smooth with your fingers.
- Can I use canned cherries? Yes, but drain them well and adjust sugar as needed since they are often sweetened.
- Why does my filling leak? This can be due to excess moisture from unthawed frozen cherries—just be sure to drain well!
- How can I tell if my pie is done? Look for a golden crust and bubbling filling; inserting a knife into the filling should reveal a gooey but thick consistency.
- Can I make this pie ahead of time? Absolutely! Just store it in the fridge until you’re ready to bake.
Wrapping Up
Baking a cherry pie isn’t just about the delicious end result; it’s about the experience—the warmth, the aroma, and the love that goes into it. I hope this recipe brings you joy, and perhaps even becomes part of your cherished memories like it has in mine. So embrace the process, share it with friends and family, and enjoy every gooey, sweet bite of your homemade cherry pie!
PrintHomemade Cherry Pie

A classic cherry pie filled with sweet and tart cherries in a buttery, flaky crust, perfect for family gatherings and summer picnics.
- Prep Time: 15 minutes
- Cook Time: 50 minutes
- Total Time: 65 minutes
- Yield: 8 servings 1x
- Category: Dessert
- Method: Baking
- Cuisine: American
- Diet: Vegetarian
Ingredients
- 2 cups fresh or frozen cherries
- 1 cup granulated sugar
- 2 tablespoons cornstarch
- 1 tablespoon lemon juice
- 1 teaspoon vanilla extract
- 1 tablespoon butter
- 1 pie crust
Instructions
- Preheat the oven to 425°F (220°C).
- Mix the fresh or frozen cherries, sugar, cornstarch, lemon juice, and vanilla extract in a bowl.
- Prepare the bottom pie crust in a pie pan, pouring the cherry mixture into it.
- Add small pieces of butter on top of the cherry filling.
- Seal the pie with the top crust, crimping the edges, and make slits in the top to release steam.
- Bake in the preheated oven for 45-50 minutes, until golden brown and bubbly.
- Cool the pie before serving to allow the filling to set.
Notes
Serve with whipped cream or vanilla ice cream for a delightful treat. Store leftovers at room temperature for up to 2 days, or refrigerate for up to a week.
Nutrition
- Serving Size: 1 slice
- Calories: 250
- Sugar: 20g
- Sodium: 200mg
- Fat: 10g
- Saturated Fat: 5g
- Unsaturated Fat: 5g
- Trans Fat: 0g
- Carbohydrates: 40g
- Fiber: 2g
- Protein: 2g
- Cholesterol: 10mg