
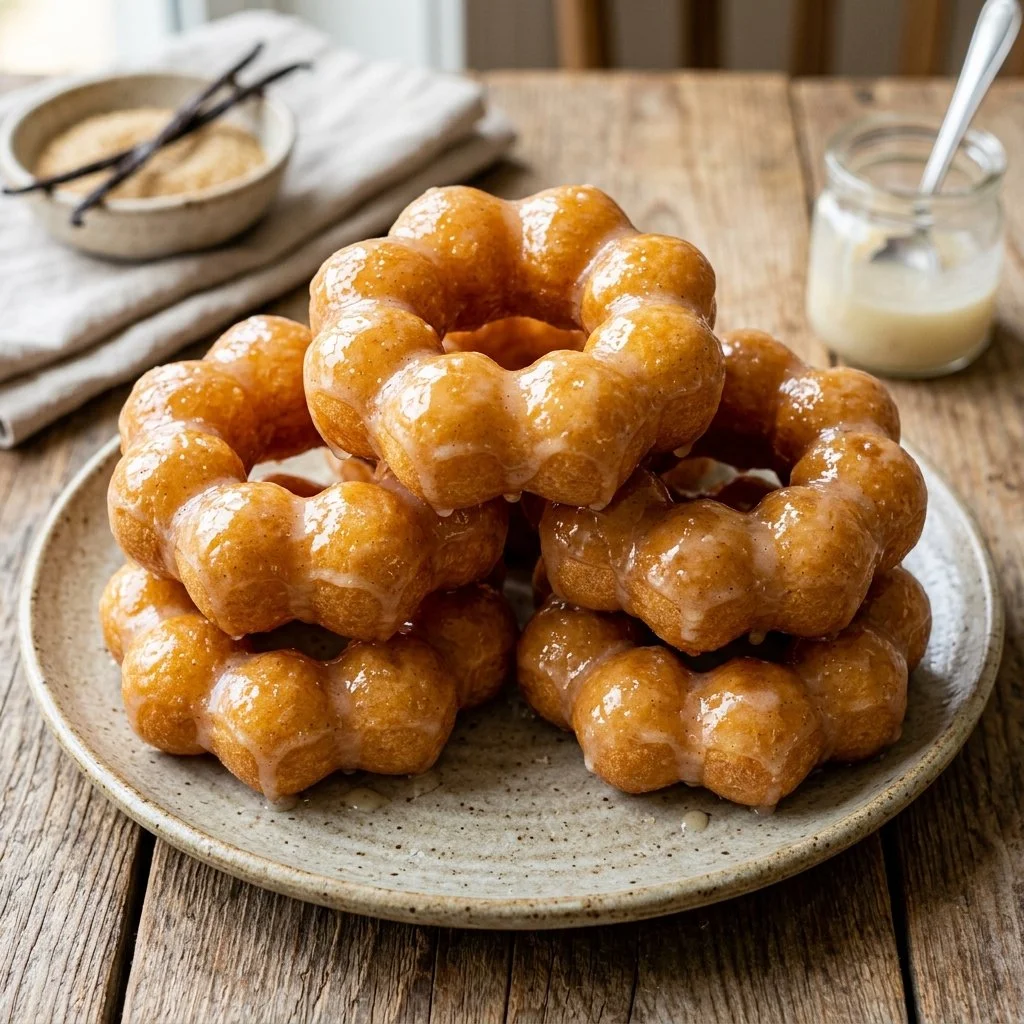
There’s something utterly magical about that first bite of a mochi donut. Soft, chewy, and slightly sweet, these donuts have a way of taking you right back to the joy of carefree childhood mornings. For me, that magic began in a small Japanese bakery nestled in my hometown. The moment I walked in, the warm, doughy aroma filled my senses, enticing me to choose a colorful selection of mochi donuts from the display case. I can still remember the joy of choosing each glaze and topping, each donut a little work of art, so inviting and delicious.
I learned to create these enchanting treats at home, hoping to recreate those fond memories and share them with my family and friends. Believe me when I say that making mochi donuts is a delightful experience — not only are they easy to whip up, but they also invite creativity with toppings and flavors.
Recipe Timing
- Prep Duration: 15 minutes
- Active Cooking: 15 minutes
- Total Duration: 30 minutes
- Portion Size: About 12 donuts
- Complexity: Simple
Nutritional Recipe
- Calories per portion: 120
- Protein: 1g
- Carbs: 23g
- Fats: 3g
- Fiber: 0g
- Sugars: 8g
- Sodium: 100mg
Why You’ll Love This Mochi Donuts
Mochi donuts are more than just a treat; they’re a delightful canvas for your culinary expression. The chewy texture, which sets them apart from classic donuts, is incredibly addictive! They hold up beautifully against glazes, sugar, and sprinkles, allowing you to decorate and personalize your donuts. Whether you’re enjoying them for breakfast, a special treat, or for dessert, mochi donuts bring an element of fun that brightens any table.
The Complete Cooking Journey
Now, let’s embark on the simple yet satisfying journey of bringing mochi donuts to life! This recipe’s straightforward steps will have you frying those donuts in no time.
Ingredients:
- 1 cup mochiko (sweet rice flour)
- 1/2 cup granulated sugar
- 1 teaspoon baking powder
- 1/2 teaspoon salt
- 1/2 cup milk
- 1 large egg
- 2 tablespoons melted butter
- 1 teaspoon vanilla extract
- Oil for frying
- Optional toppings: glaze, powdered sugar, sprinkles
Method:
Step 1: Mix the Dry Ingredients
In a large bowl, combine the mochiko, sugar, baking powder, and salt. Whisk these together well to ensure they’re evenly distributed.
Step 2: Whisk the Wet Ingredients
In another bowl, whisk together the milk, egg, melted butter, and vanilla until smooth and well combined.
Step 3: Combine Wet and Dry Ingredients
Pour the wet mixture into the dry ingredients. Stir until a smooth batter forms, being careful not to overmix.
Step 4: Heat the Oil
In a deep fryer or heavy pot, heat the oil to 350°F (175°C). A candy thermometer works wonders here, but you can also drop a tiny bit of batter into the oil; if it bubbles and rises, you’re ready to go!
Step 5: Form the Donuts
Using a piping bag or spoon, carefully drop pieces of dough into the hot oil. Depending on the size, you can form rings or simply drop small balls for a unique texture.
Step 6: Fry Until Golden Brown
Fry the donuts for about 3-4 minutes per side, until they turn a lovely golden brown.
Step 7: Drain the Oil
Use a slotted spoon to remove the donuts from the oil and drain them on paper towels. Allow some time for cooling as they cook!
Step 8: Finish with Toppings
Once cooled, you can glaze them, dust with powdered sugar, or get creative with sprinkles. The options are endless!
Serving Suggestions & Pairings
These mochi donuts are perfect as a standalone dessert or paired with a cup of coffee or tea for an afternoon treat. For a crowd-pleasing brunch, present a variety of glazed donuts alongside fresh fruit and yogurt. They’re just as delightful enjoyed fresh as they are the next day!
Storage & Leftovers Guide
Mochi donuts are best enjoyed fresh, but if you have leftovers, store them in an airtight container at room temperature for up to 2 days. If you want to keep them longer, consider freezing them, wrapped in plastic wrap, for up to a month. Just remember to let them thaw at room temperature!
Kitchen Wisdom & Success Tips
- Make sure your oil temperature is just right! Too hot and they’ll brown too quickly, too cool and they’ll become oily.
- If you don’t have a piping bag, use a ziplock bag with the corner snipped off to pipe the batter.
- Experiment with different flavors! Add matcha powder or cocoa to your batter for a twist.
Flavor Variations & Adaptations
Beyond the classic vanilla donut, you can spice things up with:
- Matcha mochi donuts
- Chocolate-infused dough
- Coconut flakes in the batter or as a topping
- Fruity glazes with berries or citrus flavors
Reader Questions & Solutions
-
Q: Can I use regular rice flour instead of mochiko?
A: Unfortunately, regular rice flour won’t give you that delightful chewiness. Stick with mochiko for the best results! -
Q: What’s the best way to ensure my donuts are evenly cooked?
A: Maintain the oil temperature and make sure not to overcrowd the pan, as that will lower the temperature and can result in uneven cooking. -
Q: How can I make these donuts gluten-free?
A: This recipe is already gluten-free since it uses sweet rice flour, but check your sugar and toppings for any hidden gluten! -
Q: Can I bake these donuts instead of frying?
A: While frying is traditional for that signature texture, you can try baking them at 350°F for about 15-20 minutes. They won’t be as chewy but will still be delicious! -
Q: How do I make a glaze for the donuts?
A: Mix powdered sugar with a bit of milk or water until you achieve your desired consistency. Add flavors like vanilla or chocolate for an extra kick!
Wrapping Up
These mochi donuts are the perfect blend of nostalgia and creativity, allowing you to enjoy a simple yet delightful cooking experience. I hope you feel inspired to bring the flavorful joy of mochi donuts into your kitchen. So gather your ingredients and let’s fry up some happiness together! Happy cooking!
PrintMochi Donuts

Deliciously chewy and slightly sweet mochi donuts that are fun to make and perfect for any occasion.
- Prep Time: 15 minutes
- Cook Time: 15 minutes
- Total Time: 30 minutes
- Yield: 12 donuts 1x
- Category: Dessert
- Method: Frying
- Cuisine: Japanese
- Diet: Gluten-Free
Ingredients
- 1 cup mochiko (sweet rice flour)
- 1/2 cup granulated sugar
- 1 teaspoon baking powder
- 1/2 teaspoon salt
- 1/2 cup milk
- 1 large egg
- 2 tablespoons melted butter
- 1 teaspoon vanilla extract
- Oil for frying
- Optional toppings: glaze, powdered sugar, sprinkles
Instructions
- Mix the Dry Ingredients: In a large bowl, combine the mochiko, sugar, baking powder, and salt. Whisk these together well to ensure they’re evenly distributed.
- Whisk the Wet Ingredients: In another bowl, whisk together the milk, egg, melted butter, and vanilla until smooth and well combined.
- Combine Wet and Dry Ingredients: Pour the wet mixture into the dry ingredients. Stir until a smooth batter forms, being careful not to overmix.
- Heat the Oil: In a deep fryer or heavy pot, heat the oil to 350°F (175°C).
- Form the Donuts: Using a piping bag or spoon, carefully drop pieces of dough into the hot oil.
- Fry Until Golden Brown: Fry the donuts for about 3-4 minutes per side.
- Drain the Oil: Use a slotted spoon to remove the donuts from the oil and drain them on paper towels.
- Finish with Toppings: Once cooled, glaze them, dust with powdered sugar, or add sprinkles.
Notes
Mochi donuts are best enjoyed fresh but can be stored in an airtight container at room temperature for up to 2 days. For longer storage, freeze wrapped in plastic for up to a month.
Nutrition
- Serving Size: 1 donut
- Calories: 120
- Sugar: 8g
- Sodium: 100mg
- Fat: 3g
- Saturated Fat: 1g
- Unsaturated Fat: 2g
- Trans Fat: 0g
- Carbohydrates: 23g
- Fiber: 0g
- Protein: 1g
- Cholesterol: 30mg