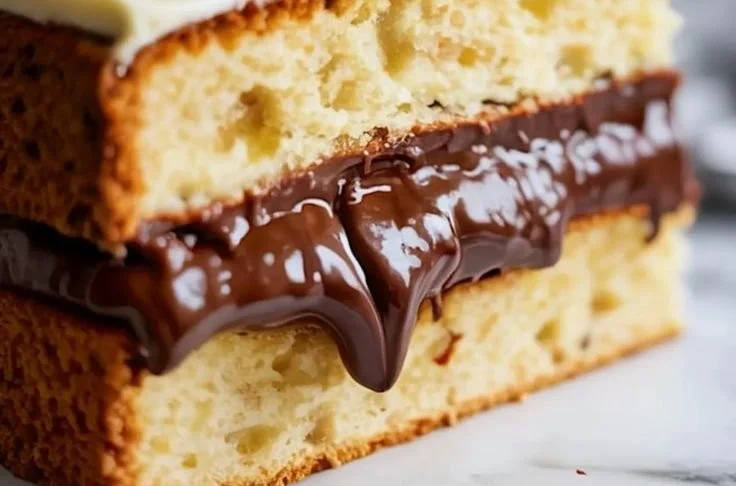
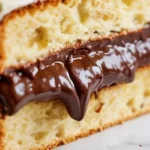
There’s something incredibly comforting about a rich, velvety chocolate filling that can elevate any dessert. I remember the first time I had a cake filled with a silky chocolate layer; it was at my friend’s birthday party. We gathered around, ready to taste her homemade confection, and as the knife sliced through the cake, we were greeted by a luscious waterfall of chocolate that instantly made our mouths water. That moment was magical, and from then on, I knew I had to recreate that experience for friends and family. Today, I’m thrilled to share my recipe for Silky Chocolate Cake Filling, a blend of heavy cream, semi-sweet chocolate, and a pinch of love, perfect for cakes, cupcakes, and pastries alike.
Recipe Timing
- Prep Duration: 10 minutes
- Active Cooking: 5 minutes
- Total Duration: 15 minutes + chilling time
- Portion Size: Enough to fill 1 average cake or about 12 cupcakes
- Complexity: Simple
Nutritional Recipe
- Calories per portion: Approximately 120 calories
- Protein: 1g per serving
- Carbs: 9g per serving
- Fats: 9g per serving
- Fiber: 0g per serving
- Sugars: 6g per serving
- Sodium: 10mg per serving
Why You’ll Love This Silky Chocolate Cake Filling
This Silky Chocolate Cake Filling is not just about taste; it’s about texture and experience. The way it melts in your mouth, the deep flavor of semi-sweet chocolate, and the luscious vibe it brings to any dessert will leave you—and your guests—wanting more. It’s versatile enough to suit any occasion, whether it’s a birthday celebration, holiday feast, or just a casual dessert night at home. Plus, the simplicity of the recipe means you can whip it up on a whim without any fuss.
The Complete Cooking Journey
Imagine walking into a warm kitchen filled with the inviting scent of chocolate. You pull out just a few simple ingredients—heavy cream, chocolate chips, butter, and vanilla. The process is almost therapeutic, and before you know it, you have a luxurious filling cooling in the fridge, eagerly awaiting the moment it will be slathered between layers of cake or piped into cupcakes.
Ingredients:
- 1 cup heavy cream
- 1 cup semi-sweet chocolate chips
- 2 tablespoons unsalted butter
- 1 teaspoon vanilla extract
Method:
Step 1: Gently Simmer the Cream
In a saucepan over medium heat, bring the heavy cream to a gentle simmer. Watch for tiny bubbles forming at the edges—this means you’re on the right track!
Step 2: Melt the Chocolate and Butter
Remove the pan from the heat and add in the chocolate chips and butter. This is where the magic happens! Stir until everything is completely melted and the mixture is smooth and glossy.
Step 3: Introduce the Flavor
Stir in the vanilla extract, allowing its warm aroma to mingle with the chocolate.
Step 4: Cool and Thicken
Let the mixture cool to room temperature—it will thicken as it cools. Then, refrigerate until it reaches your desired consistency, yielding a creamy, spreadable filling that’s simply irresistible.
Step 5: It’s Ready to Use!
Once thickened to perfection, use this chocolate goodness as a filling for cakes, cupcakes, or even pastries.
Serving Suggestions & Pairings
This silky filling is fabulous on its own but can be even better when paired with complementary flavors. Consider pairing it with a light vanilla sponge cake, a spiced pumpkin cake, or even a delightful raspberry filling for a touch of tartness. Top with whipped cream or a sprinkle of sea salt for an upscale twist.
Storage & Leftovers Guide
Store any leftovers in an airtight container in the refrigerator for up to one week. If it becomes too firm, simply give it a quick whip with a spatula to bring back its silky texture.
Kitchen Wisdom & Success Tips
- Use Quality Chocolate: The better the chocolate, the richer your filling will taste. Opt for semi-sweet or dark chocolate chips you enjoy snacking on.
- Temperature Matters: Make sure you don’t bring the cream to a boil. A gentle simmer is ideal to prevent any scorching.
- Thickening Time: If you plan to use this filling for a special occasion, make it a day ahead. Chilling overnight enhances the flavors beautifully!
Flavor Variations & Adaptations
Feel free to mix it up! Try adding a splash of espresso or a sprinkle of sea salt for a mocha flavor. For a fruity twist, mix in a spoonful of fruit puree after the filling has cooled.
Reader Questions & Solutions
- How long will the filling last? It stays fresh in the fridge for about a week.
- Can this be used for layered cakes? Absolutely! Just ensure that your cake layers are cooled completely.
- How do I make it dairy-free? Substitute coconut cream and dairy-free chocolate chips for a delicious vegan option.
- Can I use it as a frosting? Yes! Just whip it for a minute or two to incorporate air and make it spreadable for frosting.
- What do I do if it looks grainy? This can happen if the chocolate is overheated. Use a double boiler for better control next time.
Wrapping Up
Creating beautiful desserts doesn’t have to be complicated. This Silky Chocolate Cake Filling brings luxury to the table with minimal effort, allowing you to impress loved ones without breaking a sweat. So, preheat your cooking spirit, grab those ingredients, and let the shimmers of chocolate goodness whisk you away to dessert bliss. Happy baking!
PrintSilky Chocolate Cake Filling
A rich and velvety chocolate filling perfect for cakes, cupcakes, and pastries, made with heavy cream and semi-sweet chocolate.
- Prep Time: 10 minutes
- Cook Time: 5 minutes
- Total Time: 15 minutes + chilling time
- Yield: Enough to fill 1 average cake or about 12 cupcakes
- Category: Dessert
- Method: Chilling
- Cuisine: American
- Diet: Vegetarian
Ingredients
- 1 cup heavy cream
- 1 cup semi-sweet chocolate chips
- 2 tablespoons unsalted butter
- 1 teaspoon vanilla extract
Instructions
- Gently simmer the cream in a saucepan over medium heat until small bubbles form at the edges.
- Remove the pan from heat and add the chocolate chips and butter. Stir until smooth and glossy.
- Stir in the vanilla extract until well mixed.
- Let the mixture cool to room temperature and refrigerate until desired consistency is achieved.
- Use the chocolate filling for cakes, cupcakes, or pastries once thickened.
Notes
Use quality chocolate for the best flavor, and chill overnight for enhanced taste. Pairs well with vanilla sponge or raspberry filling.
Nutrition
- Serving Size: 1 serving
- Calories: 120
- Sugar: 6g
- Sodium: 10mg
- Fat: 9g
- Saturated Fat: 5g
- Unsaturated Fat: 4g
- Trans Fat: 0g
- Carbohydrates: 9g
- Fiber: 0g
- Protein: 1g
- Cholesterol: 20mg