
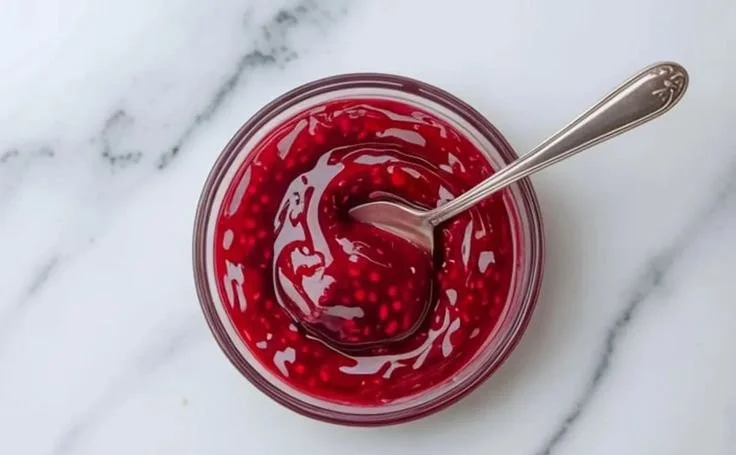
Nothing quite compares to the first taste of summer, and for me, that taste is perfectly encapsulated in a burst of sun-warmed raspberries. Growing up, we had a little patch in our backyard where vivid red berries would ripple like tiny jewels in the sun. I remember rushing outside after school, with my fingers stained pink, gathering as many as I could before my mom could whisk them away into a delicious raspberry cake.
This raspberry cake filling is not just a recipe; it’s a trip down memory lane, a sweet reminder of those carefree days spent picking fruit and enjoying the fruits of our labor. Today, I’d love to share this simple yet delightful raspberry cake filling that is sure to bring a splash of summer to your kitchen, regardless of the season.
Recipe Timing
- Prep Duration: 10 minutes
- Active Cooking: 10 minutes
- Total Duration: 20 minutes
- Portion Size: Serves about 2 cups of filling
- Complexity: Simple
Nutritional Recipe
- Calories per portion: Approximately 100 calories
- Protein: 1g
- Carbs: 25g
- Fats: 0g
- Fiber: 3g
- Sugars: 22g
- Sodium: 1mg
Why You’ll Love This Raspberry Cake Filling
This raspberry cake filling is a heavenly concoction of tart and sweet, bringing a delightful pop of flavor to your baking. It’s versatile enough to complement a variety of desserts, from layered cakes to simple tarts. The freshness of the raspberries paired with a hint of lemon and vanilla makes it a standout. Plus, it’s incredibly easy to whip up, allowing even novice bakers to impress their friends and family.
The Complete Cooking Journey
Let’s embark on this exciting culinary adventure! This simple recipe will guide you through creating a luscious raspberry filling perfect for cakes, cupcakes, or even as a topping for ice cream.
Ingredients:
- 2 cups fresh raspberries
- 1/2 cup sugar
- 2 tablespoons cornstarch
- 1/4 cup water
- 1 teaspoon lemon juice
- 1 teaspoon vanilla extract
Method:
Step 1: Combine Ingredients
In a saucepan, combine the 2 cups of fresh raspberries, 1/2 cup of sugar, 2 tablespoons of cornstarch, and 1/4 cup of water. Gently mix until the raspberries are coated with sugar and cornstarch.
Step 2: Heat the Mixture
Place the saucepan over medium heat and cook the mixture, stirring gently. You’ll want to keep an eye on it!
Step 3: Bring to a Boil
As the mixture heats, it will begin to bubble. Keep stirring constantly until it comes to a vibrant boil. This is where the magic happens!
Step 4: Thicken the Filling
Once boiling, reduce the heat slightly and keep stirring for a few more minutes. You’ll notice the mixture thickening nicely; this should take about 2-3 minutes.
Step 5: Add Flavor
Once thickened, remove the filling from the heat. Stir in 1 teaspoon of lemon juice and 1 teaspoon of vanilla extract, which will elevate the flavor profile beautifully.
Step 6: Cool Down
Let the mixture cool before using it as a cake filling. This will help it set even further and be easier to work with.
Serving Suggestions & Pairings
Pair this fabulous raspberry filling with sponge cakes, vanilla buttercream, or even a delicate whipped cream. It’s also delightful swirled into yogurt or oatmeal for a fruity breakfast treat. You can get creative by layering it in trifles or even topping pancakes for a brunch that will leave guests raving!
Storage & Leftovers Guide
Store any leftovers in an airtight container in the refrigerator for up to one week. You may also freeze it for up to three months. Just thaw and gently warm it up when you’re ready to use it!
Kitchen Wisdom & Success Tips
- Make sure to stir constantly while heating to avoid any burning.
- Check the consistency: if it’s too thick, you can whisk in a small amount of water to loosen it up.
- Experiment with different berries: this method works wonderfully with strawberries or blackberries too!
Flavor Variations & Adaptations
Feeling adventurous? Try adding a pinch of cinnamon for warmth or a splash of raspberry liqueur for an adult twist. You could also sieve the mixture after cooking for a smoother filling if you prefer.
Reader Questions & Solutions
-
What if my filling is too runny?
If it doesn’t thicken enough, return it to the heat and cook a little longer, stirring continuously. -
Can I use frozen raspberries?
Absolutely! Just be aware that you may need to cook them a bit longer as they’ll release more water. -
How can I naturally sweeten this filling?
Try using honey or maple syrup instead of sugar but note that this may alter the consistency slightly. -
What’s the best way to layer this filling in a cake?
Allow the filling to cool completely before spreading it between cake layers to prevent any slippage. -
Can I make this in advance?
Yes, this filling can be made up to a week in advance and stored in the fridge. Just give it a stir before using.
Wrapping Up
This raspberry cake filling embodies the vibrant essence of summer, and I hope it brings as much joy to your kitchen as it does to mine. With its simple ingredients and quick preparation, you’re just a few minutes away from transforming your baked creations into something truly memorable. Embrace the fruity sweetness of raspberries and delight your family with this easy dessert filling. Happy baking! 🍰
PrintRaspberry Cake Filling
A simple and delightful raspberry cake filling that brings a burst of summer flavors to your desserts.
- Prep Time: 10 minutes
- Cook Time: 10 minutes
- Total Time: 20 minutes
- Yield: 2 cups 1x
- Category: Dessert
- Method: Stovetop
- Cuisine: American
- Diet: Vegetarian
Ingredients
- 2 cups fresh raspberries
- 1/2 cup sugar
- 2 tablespoons cornstarch
- 1/4 cup water
- 1 teaspoon lemon juice
- 1 teaspoon vanilla extract
Instructions
- Combine ingredients: In a saucepan, combine the raspberries, sugar, cornstarch, and water. Gently mix until coated.
- Heat the mixture: Place the saucepan over medium heat and cook, stirring gently.
- Bring to a boil: Keep stirring constantly until it bubbles and comes to a boil.
- Thicken the filling: Reduce heat and stir for 2-3 minutes until thickened.
- Add flavor: Remove from heat and stir in lemon juice and vanilla extract.
- Cool down: Let the mixture cool before using as a cake filling.
Notes
Store leftovers in an airtight container for up to one week or freeze for up to three months.
Nutrition
- Serving Size: 0.5 cup
- Calories: 100
- Sugar: 22g
- Sodium: 1mg
- Fat: 0g
- Saturated Fat: 0g
- Unsaturated Fat: 0g
- Trans Fat: 0g
- Carbohydrates: 25g
- Fiber: 3g
- Protein: 1g
- Cholesterol: 0mg