There’s something truly special about a crispy, golden chicken cutlet that brings nostalgia flooding back. I remember weekends at my grandmother’s house, where the air would be filled with the tantalizing aroma of chicken frying in the kitchen. She had a way of making the simplest meals feel like a feast, and chicken cutlets were often the star of the show. Every bite was a perfect blend of crunchy texture and juicy chicken, accompanied by laughter and stories shared around the table.
None of us could resist the crisp perfection of her cutlets, and I’ve been chasing that dream in my own kitchen ever since. Today, I want to share my own version of Quick & Easy Chicken Cutlets—a recipe that not only honors my grandmother’s legacy but also fits seamlessly into our busy lives.
Recipe Timing
- Prep Duration: 10 minutes
- Active Cooking: 15 minutes
- Total Duration: 25 minutes
- Portion Size: Serves 4
- Complexity: Simple
Nutritional Recipe
- Calories per portion: Approximately 300 calories
- Protein: 27 grams
- Carbs: 18 grams
- Fats: 14 grams
- Fiber: 1 gram
- Sugars: 0 grams
- Sodium: 480 mg
Why You’ll Love This Quick & Easy Chicken Cutlets
These chicken cutlets are the perfect solution for busy weeknights or a satisfying family dinner. They’re quick to prepare, require minimal effort, and are unbelievably delicious. The best part? You can enjoy the crispy delight without any fuss or extensive ingredients. Whether you enjoy them on their own, in a sandwich, or over a fresh salad, they’re bound to inspire compliments at the dinner table!
The Complete Cooking Journey
Get ready for a simple yet gratifying cooking experience. This recipe is packed with flavor and versatility, making it a staple in any home chef’s collection. In just 25 minutes, you can recreate the childhood favorites and fill your kitchen with comfort-food aromas. Let’s dive into the ingredients and method!
Ingredients:
- 2 cups boneless, skinless chicken breasts (sliced thin)
- 1 cup all-purpose flour (can substitute with gluten-free flour)
- 2 large eggs (beaten)
- 1 cup breadcrumbs (preferably seasoned; can substitute with gluten-free breadcrumbs)
- To taste: salt and pepper
- 1 teaspoon garlic powder (optional for added flavor)
- As needed for frying: vegetable oil
Method:
Step 1: Preparation
Start by trimming any excess fat from the chicken breasts. Slice them thinly for perfect frying. This is a great opportunity to bond with your culinary side—imagine the flavors you’ll infuse with each slice!
Step 2: Setting Up Your Dredging Station
Create an organized station for coating your chicken. Set up three shallow dishes: one for seasoned flour (mix in salt, pepper, and garlic powder), one for beaten eggs, and one for breadcrumbs. Having everything in place makes the frying process smoother.
Step 3: Dredging the Chicken
Take each slice of chicken and coat it in flour, then dip it into the egg mixture, ensuring it’s fully covered. Finish by rolling it in the breadcrumbs, pressing gently to make sure the crumbs adhere well. This multi-step process is essential for a crunchy coating!
Step 4: Heating the Oil
In a large skillet, heat about a half-inch of vegetable oil over medium heat. You will know it’s ready when a little bit of breadcrumbs sizzles upon contact. The heat needs to be just right to achieve that golden brown perfection without burning.
Step 5: Frying the Cutlets
Carefully add the breaded chicken cutlets to the skillet (do not overcrowd the pan). Fry for about 4-5 minutes on each side, or until they turn golden brown. Turn them only once to maintain the crunchy exterior we crave.
Step 6: Draining
Once cooked, use a slotted spoon to transfer the chicken cutlets onto a paper towel-lined plate. This will help absorb any excess oil, making them feel lighter yet deliciously crispy.
Step 7: Serving the Cutlets
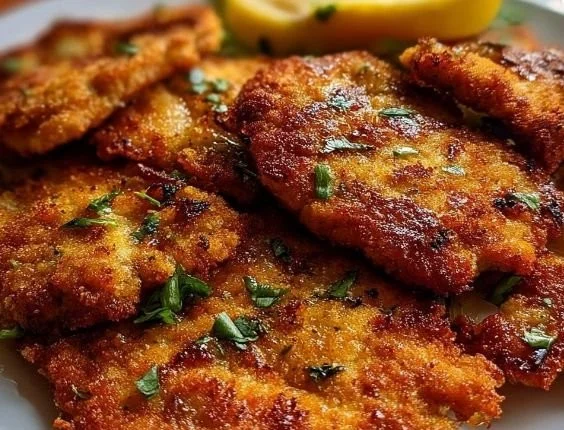
Now, it’s time to serve! You could enjoy these on their own, with a squeeze of lemon, or paired with your favorite dipping sauce.
Serving Suggestions & Pairings
These cutlets are incredibly versatile. Serve them on a bun for a decadent chicken sandwich, or slice them over a fresh salad for a lighter meal. Pair them with mashed potatoes, steamed vegetables, or a side of creamy coleslaw for a true feast that will brighten up any dining occasion.
Storage & Leftovers Guide
Store any leftovers in an airtight container in the refrigerator for up to 3 days. For best results, reheat them in the oven to maintain their crunch, rather than the microwave, which can make them soggy.
Kitchen Wisdom & Success Tips
- If you want extra crunch, double coat your cutlets by re-dipping them in egg and breadcrumbs.
- If working with gluten-free options, ensure that all components are certified gluten-free to avoid cross-contamination.
- Experiment with different breadcrumb types—panko will give you an extra airy crunch!
Flavor Variations & Adaptations
Try adding a touch of grated Parmesan cheese to the breadcrumb mix for a cheesy twist, or use different spices like paprika and Italian herbs to change up the flavor profile. For a healthier twist, bake the cutlets in the oven at 400°F until golden brown instead of frying.
Reader Questions & Solutions
-
Can I make these cutlets ahead of time?
Yes! You can bread the chicken cutlets a few hours in advance and store them in the refrigerator until you’re ready to fry. -
What if I don’t have chicken breasts?
You can use chicken thighs or even turkey breasts for a variation! -
How can I keep the cutlets crispy if I need to prepare them in advance?
Keep them un-sauced until it’s time to serve. Storing them in a wire rack in a warm oven (170°F) can also help them maintain crispiness. -
Can I freeze the cutlets?
Absolutely! Freeze the breaded (but not fried) cutlets in a single layer on a baking sheet. Once frozen, transfer them to a freezer-safe bag for up to 2 months. -
What type of oil is best for frying?
Use neutral-flavored oils like canola or vegetable oil, as they withstand higher temperatures and won’t overpower the flavor of the chicken.
Wrapping Up
These Quick & Easy Chicken Cutlets are more than just a meal; they are an embodiment of comfort, family, and flavor. So, roll up your sleeves, gather your ingredients, and dive into this delightful culinary adventure. I guarantee you’ll create not just dinner, but memories that will last a lifetime. Happy cooking!
PrintQuick & Easy Chicken Cutlets

A nostalgic recipe for crispy, golden chicken cutlets that are easy to prepare and delicious.
- Prep Time: 10 minutes
- Cook Time: 15 minutes
- Total Time: 25 minutes
- Yield: 4 servings 1x
- Category: Main Course
- Method: Frying
- Cuisine: American
- Diet: Gluten-Free (if using alternatives)
Ingredients
- 2 cups boneless, skinless chicken breasts (sliced thin)
- 1 cup all-purpose flour (can substitute with gluten-free flour)
- 2 large eggs (beaten)
- 1 cup breadcrumbs (preferably seasoned; can substitute with gluten-free breadcrumbs)
- To taste: salt and pepper
- 1 teaspoon garlic powder (optional)
- Vegetable oil (for frying)
Instructions
- Start by trimming any excess fat from the chicken breasts. Slice them thinly for perfect frying.
- Create an organized station for coating your chicken with seasoned flour, beaten eggs, and breadcrumbs.
- Take each slice of chicken and coat it in flour, dip into the egg mixture, and roll in breadcrumbs.
- In a large skillet, heat about a half-inch of vegetable oil over medium heat.
- Carefully add the breaded chicken cutlets and fry for about 4-5 minutes on each side.
- Once cooked, use a slotted spoon to transfer the chicken cutlets to a paper towel-lined plate.
- Now, it’s time to serve your chicken cutlets!
Notes
For extra crunch, double coat your cutlets by re-dipping them in egg and breadcrumbs. For gluten-free, ensure all ingredients are certified gluten-free.
Nutrition
- Serving Size: 1 serving
- Calories: 300
- Sugar: 0g
- Sodium: 480mg
- Fat: 14g
- Saturated Fat: 3g
- Unsaturated Fat: 8g
- Trans Fat: 0g
- Carbohydrates: 18g
- Fiber: 1g
- Protein: 27g
- Cholesterol: 210mg