There’s something undeniably comforting about the smell of simmering fruit wafting through the kitchen. It reminds me of my grandmother’s cozy autumn afternoons, spending hours together with bowls of berries and fruits, turning them into delightful spreads while sharing stories of her youth. One particular memory that stands out is of her making pear jam, coaxing out the sweetness of ripe, juicy pears. That lovely blend of fruit, sugar, and spices would weave its way into my heart, knowing it would find its forever home on warm slices of toasted bread.
If you’ve never made jam before, believe me when I say it’s as enjoyable as it is rewarding. The process is simple, and the results are nothing short of spectacular. Let’s dive into a recipe for Pear Jam that will fill your kitchen with nostalgic warmth and sweetness.
Recipe Timing
- Prep Duration: 30 minutes
- Active Cooking: 10 minutes
- Total Duration: 40 minutes
- Portion Size: About 4 half-pint jars
- Complexity: Simple
Nutritional Recipe
- Calories per portion: ~100 kcal
- Protein: 0.1 g
- Carbs: 25 g
- Fats: 0 g
- Fiber: 1 g
- Sugars: 18 g
- Sodium: 0 mg
Why You’ll Love This Pear Jam
There’s an unparalleled satisfaction that comes from preserving the sweet essence of pears in a jar, especially when you’ve put in the effort of selecting the perfect fruit. Not only does this Pear Jam taste heavenly on toast, pancakes, or yogurt, but it’s also versatile–perfect for cheese boards, or as a sweetened glaze on roasted meats. In a world so fast-paced, making this jam is a gentle reminder to slow down, appreciate the natural bounty of the season, and savor every spoonful.
The Complete Cooking Journey
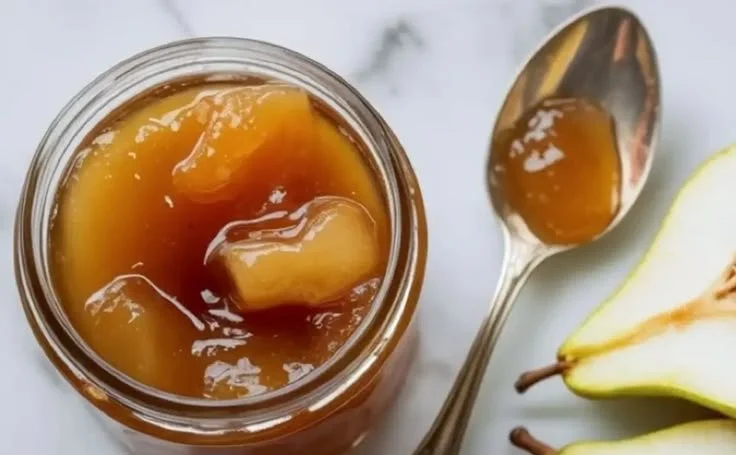
Making this Pear Jam takes you through a delightful sensory journey: from the vibrant greens and yellows of fresh pears to the tantalizing smell of lemon and spices as they meld together. You’ll experience the simple joy of preparing something homemade that you can share with loved ones.
Ingredients:
- 4 cups ripe pears, peeled and chopped
- 1 cup sugar
- 1 tablespoon lemon juice
- 1/4 teaspoon ground cinnamon
- 1/4 teaspoon nutmeg
- 1 packet fruit pectin
Method:
Step 1: Macerate the Pears
In a large pot, combine the chopped pears, sugar, lemon juice, cinnamon, and nutmeg. Let sit for about 30 minutes to macerate. This process allows the pears to release their natural juices, creating a syrupy base for the jam.
Step 2: Bring to a Boil
Bring the mixture to a boil over medium heat, stirring occasionally. As it heats, you’ll start to feel that familiar tantalizing aroma fill the air—your home is about to become a fragrant sanctuary!
Step 3: Add the Fruit Pectin
Add the fruit pectin to the boiling mixture and continue to boil for another 1-2 minutes until the mixture thickens. It’s now transforming into a lush, jam-like consistency.
Step 4: Test for Doneness
Test for doneness by placing a spoonful on a cold plate and checking if it holds its shape. If it does, congratulations! You’re almost there.
Step 5: Jar the Pear Jam
Pour the hot pear jam into sterilized jars and seal them tightly. The jars should be warm, and as they cool, you’ll hear that delightful pop indicating a good seal.
Step 6: Cool and Store
Allow the jars to cool completely at room temperature before storing them in the refrigerator. The hardest part now is waiting to dig in!
Serving Suggestions & Pairings
Spread this delightful Pear Jam over freshly baked scones or layer it with cream cheese on a bagel for a decadent breakfast treat. Pair it with a sharp cheese for a fabulous appetizer, or swirl it into your morning oatmeal or yogurt—your taste buds will thank you!
Storage & Leftovers Guide
Your homemade pear jam will last about 2-3 weeks in the fridge, but who are we kidding? It rarely lasts that long! If you’ve made a larger batch, feel free to freeze the jars for up to 6 months. Just be sure to leave some space at the top of the jar for expansion.
Kitchen Wisdom & Success Tips
- Choose the right pears: Ripe pears are key; look for those that yield slightly to pressure but are not overly soft.
- Sterilizing jars: It’s so important! You can do this by placing jars in a boiling water bath for 10 minutes or running them through a hot dishwasher cycle.
- Consistency check: If the jam doesn’t seem to thicken properly, don’t panic! Simply return it to the heat and boil a little longer.
Flavor Variations & Adaptations
Feeling adventurous? Consider adding a splash of vanilla extract or a little ginger for a subtle twist. You could even experiment with different spices like allspice or cardamom for a unique flavor profile.
Reader Questions & Solutions
-
Can I use underripe pears?
It’s best to avoid underripe pears, as they won’t break down properly and can affect the texture of your jam. -
What if my jam is too runny?
If your jam isn’t thickening, try boiling it a little longer. Make sure to check using the cold plate test. -
Can I double the recipe?
Yes, but only do so if you have a large pot and plenty of jars. Cooking in smaller batches often yields better results. -
How do I know my jars are sterilized?
Jars are sterilized if they are placed in boiling water for 10 minutes or in a hot dishwasher. Ensure they are still warm when filling. -
Is it necessary to add pectin?
Pectin is generally necessary for achieving the right consistency in jam. However, some fruits have enough natural pectin; just be prepared for a different texture if you omit it.
Wrapping Up
Making Pear Jam is an experience to be cherished, a little piece of joy that you can create and share with loved ones. Embrace the process, roll up your sleeves, and honor the beautiful fruit in their season. I hope this recipe brings the same comfort and warmth to your kitchen that it has brought to mine. Now, gather your ingredients, call your friends over, and let the jam-making adventure begin!
PrintPear Jam
A delightful homemade pear jam filled with the sweetness of ripe pears, perfect for spreading on toast or using in various dishes.
- Prep Time: 30 minutes
- Cook Time: 10 minutes
- Total Time: 40 minutes
- Yield: About 4 half-pint jars 1x
- Category: Preserves
- Method: Canning
- Cuisine: American
- Diet: Vegetarian
Ingredients
- 4 cups ripe pears, peeled and chopped
- 1 cup sugar
- 1 tablespoon lemon juice
- 1/4 teaspoon ground cinnamon
- 1/4 teaspoon nutmeg
- 1 packet fruit pectin
Instructions
- Macerate the pears by combining them with sugar, lemon juice, cinnamon, and nutmeg. Let sit for about 30 minutes.
- Bring the mixture to a boil over medium heat, stirring occasionally.
- Add the fruit pectin to the boiling mixture and continue to boil for another 1-2 minutes until thickened.
- Test for doneness by placing a spoonful on a cold plate.
- Pour the hot pear jam into sterilized jars and seal them tightly.
- Allow the jars to cool completely at room temperature.
Notes
Store your homemade pear jam in the refrigerator for 2-3 weeks or freeze for up to 6 months. Ensure jars are properly sterilized.
Nutrition
- Serving Size: 1 tablespoon
- Calories: 100
- Sugar: 18g
- Sodium: 0mg
- Fat: 0g
- Saturated Fat: 0g
- Unsaturated Fat: 0g
- Trans Fat: 0g
- Carbohydrates: 25g
- Fiber: 1g
- Protein: 0.1g
- Cholesterol: 0mg