There’s something magical about the experience of baking a cheesecake. The gentle hum of the oven, the rich aroma wafting through the kitchen, and the anticipation of taking that first creamy bite transport us to a place of pure indulgence. For me, Coconut Cheesecake is the epitome of this bliss. It embodies the essence of sun-soaked beaches and tropical vacations, all while sitting right in my own kitchen.
I remember the first time I tasted a coconut cheesecake during a family gathering. The creamy filling paired with the slightly crunchy graham cracker crust was heavenly, and I knew I had to recreate this delight in my home. Fast forward a few years, and I’ve perfected my recipe—one that I am excited to share with you! Get ready to embark on a mouthwatering adventure that combines the rich flavors of coconut, cream cheese, and a hint of vanilla, all wrapped up in a luscious cheesecake.
Recipe Timing
- Prep Duration: 30 minutes
- Active Cooking: 10 minutes (for the crust), 1 hour (for baking the cheesecake)
- Total Duration: Approximately 5 to 6 hours (includes cooling and chilling time)
- Portion Size: Serves 10-12
- Complexity: Moderate
Nutritional Recipe
- Calories per portion: Approximately 370
- Protein: 5 grams
- Carbs: 40 grams
- Fats: 22 grams
- Fiber: 1 gram
- Sugars: 23 grams
- Sodium: 200 mg
Why You’ll Love This Coconut Cheesecake Recipe
This Coconut Cheesecake isn’t just dessert; it’s an experience! Each bite evokes a sense of paradise, thanks to the rich coconut flavor paired with the smooth texture of the cream cheese. The graham cracker crust adds a delightful crunch that perfectly contrasts the creamy filling. It’s indulgent yet not overwhelming, making it an ideal treat for special occasions or any day that needs a little sweetening. Plus, the optional sour cream topping brings a refreshing tangy finish that ties it all together beautifully.
The Complete Cooking Journey
Baking this Coconut Cheesecake is not just about the finished product; it’s about the journey. From mixing the crust to folding in the creamy filling, every step is a memory in the making. The process allows you to pour love into your creation, and when you finally unveil it, you’ll feel a sense of pride and accomplishment. Baking connects us to our roots, our family, and to the joy that comes with sharing good food.
Ingredients:
FOR THE CRUST:
- Graham cracker crumbs: 1 ½ cups
- Granulated sugar: 1 tablespoon
- Unsalted butter, melted: 6 tablespoons
FOR THE FILLING:
- Cream cheese, room temperature: 24 ounces (3 blocks)
- Granulated sugar: ¾ cup
- Coconut cream (well stirred): 1 cup
- Vanilla extract: 1 teaspoon
- Eggs, room temperature: 3 large
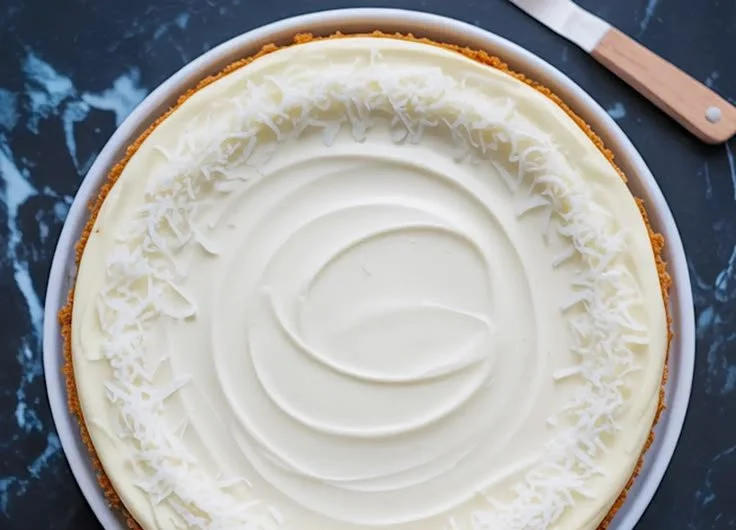
- Sweetened shredded coconut: ½ cup
FOR THE OPTIONAL TOPPING:
- Sour cream: 1 cup
- Granulated sugar: 2 tablespoons
- Vanilla extract: ½ teaspoon
Method:
Step 1: Prepare the Pan
Preheat the oven to 325°F (163°C). Line the bottom of a 9-inch springform pan with parchment paper. Set aside a larger roasting pan for the water bath.
Step 2: Make the Crust
In a mixing bowl, combine the graham cracker crumbs, melted butter, and sugar until evenly mixed. Press the crumb mixture firmly into the bottom of the prepared springform pan using the bottom of a glass. Bake for 10 minutes, then remove and let it cool while you prepare the filling.
Step 3: Make the Filling
In a large mixing bowl, beat the softened cream cheese until it’s smooth and free of lumps. Gradually add the sugar while continuing to beat until the mixture is silky. Incorporate the coconut cream and vanilla extract, mixing until fully combined.
Step 4: Add the Eggs
Add the eggs one at a time, mixing slowly on low speed or by hand until just combined after each addition. Avoid overmixing to reduce the risk of cracks. Gently fold in the shredded coconut last.
Step 5: Assemble and Bake
Pour the filling over the cooled crust. Place the springform pan inside the larger roasting pan and carefully pour hot water into the outer pan until it reaches halfway up the sides of the springform pan. Bake for 55 to 65 minutes, or until the edges are set but the center still jiggles slightly when shaken.
Step 6: Cool Gradually
Turn off the oven and crack the oven door open. Allow the cheesecake to sit in the oven for 1 hour. Then, remove it from the water bath, dry the bottom of the pan, and place it in the refrigerator uncovered to chill for at least 4 hours or overnight.
Step 7: Optional Topping
If using the sour cream topping, mix together the sour cream, sugar, and vanilla until smooth. Spread evenly over the fully chilled cheesecake before serving.
Serving Suggestions & Pairings
This Coconut Cheesecake pairs perfectly with a refreshing tropical fruit salad or a scoop of coconut sorbet. Consider enjoying it alongside a rich cup of coffee or a chilled glass of dessert wine. It’s a versatile dessert that can hold its own or complement a lovely meal.
Storage & Leftovers Guide
To store leftover cheesecake, cover it tightly with plastic wrap or foil and refrigerate. It will last for up to 5 days in the refrigerator. For longer storage, slice and freeze the cheesecake in an airtight container for up to 2 months. Just thaw it in the refrigerator overnight before serving.
Kitchen Wisdom & Success Tips
- Room Temperature Ingredients: Make sure your cream cheese and eggs are at room temperature for a smoother filling.
- Avoid Cracks: Don’t overmix your eggs. Mix just until combined to prevent air bubbles that can lead to cracks when baking.
- Water Bath 101: Using a water bath helps keep the cheesecake moist and prevents the edges from overcooking.
Flavor Variations & Adaptations
Feel free to switch up the flavors! Swap the coconut cream for another flavor of cream, like almond or chocolate, and adjust the shredded coconut to match. You could even add a swirl of passion fruit or mango puree for a refreshing twist.
Reader Questions & Solutions
- Why did my cheesecake crack? Overmixing the batter or baking at too high of a temperature can cause cracks. Make sure to mix just until combined and use the water bath method.
- How can I tell when my cheesecake is done? The edges should be set, and the center should still jiggle slightly. It will continue setting as it cools.
- Can I use light cream cheese? Yes, but the texture might be slightly less creamy.
- What if I don’t have coconut cream? You can substitute with coconut milk, but for a richer flavor, use coconut cream if possible.
- How long does it take to chill? Ideally, let it chill for at least 4 hours or overnight for the best texture and flavor.
Wrapping Up
Baking this Coconut Cheesecake is not only about delicious flavors; it’s an act of love that connects us with our culinary traditions and joyful moments. As you whip up this recipe, don’t forget to enjoy the process, and relish in the wonderful smells filling your kitchen. Whether it’s for a special occasion or just to treat yourself, this cheesecake will not disappoint. Happy baking, and may your kitchen be filled with joy and deliciousness!