
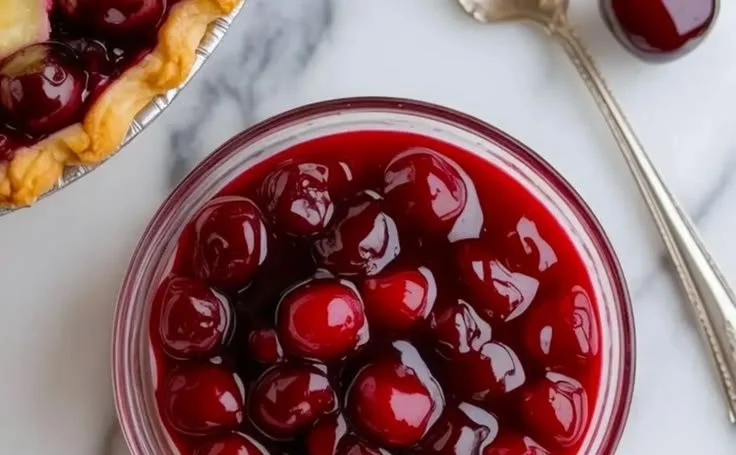
Nothing quite compares to the delightful aroma of fresh cherries wafting through your kitchen. Growing up, my grandmother would always greet the arrival of summer with jars laden with glistening cherry pie filling, each one bursting with the flavor of ripe, juicy cherries. As I helped her pit and chop, the kitchen became a sanctuary filled with laughter and sweet memories. It’s these sweet-inspired moments that keep me connected to my roots, and now, I want to share this time-honored tradition with you.
Making your own cherry pie filling is remarkably easy and incredibly rewarding. Let’s dive into this wonderfully simple recipe that transforms fresh cherries into a divine topping for your favorite desserts!
Recipe Timing
- Prep Duration: 15 minutes
- Active Cooking: 15 minutes
- Total Duration: 30 minutes
- Portion Size: Approximately 2 cups
- Complexity: Simple
Nutritional Recipe
- Calories per portion: 105
- Protein: 0.5 grams
- Carbs: 24 grams
- Fats: 0 grams
- Fiber: 1 gram
- Sugars: 20 grams
- Sodium: 1 mg
Why You’ll Love This Homemade Cherry Pie Filling
This homemade cherry pie filling doesn’t just elevate your desserts—it brings a wave of nostalgia with every spoonful. The combination of sweet-tart cherries with a hint of lemon and the warm undertone of vanilla creates a filling that’s bursting with flavor. Perfectly thickened for pies and tarts, it can also be used over ice cream or yogurt for a decadent treat. Plus, there’s something incredibly satisfying about crafting your own fillings from scratch!
The Complete Cooking Journey
Crafting this cherry pie filling is straightforward and yields deliciously rewarding results! From the initial chopping of cherries to the final cooling stage, each step is a part of the joyful journey that connects us with the beauty of cooking.
Ingredients:
- Fresh cherries
- Sugar
- Cornstarch
- Water
- Lemon juice
- Vanilla extract
Method:
Step 1: Prepare the Cherries
Pit and chop the fresh cherries, allowing their sweet juices to flow freely, making the base of your filling luscious and vibrant.
Step 2: Combine Ingredients
In a saucepan, combine the cherries with sugar and lemon juice. The sugar will bring out the cherries’ natural sweetness while the lemon juice adds a refreshing zing.
Step 3: Create the Slurry
In a small bowl, mix cornstarch with water to create a slurry. This mixture will help thicken your cherry filling to the perfect consistency.
Step 4: Simmer the Mixture
Heat the cherry mixture over medium heat until it starts to simmer. This heating process will help bring out even more flavor from the cherries.
Step 5: Thicken the Filling
Gradually add the cornstarch slurry while stirring continuously to thicken the mixture. You’ll see it start to transform into a beautiful, thick concoction!
Step 6: Cook Until Bubbly
Cook the filling until it’s thick and bubbly, which indicates that the cornstarch has activated and is doing its job beautifully.
Step 7: Infuse with Flavor
Remove the saucepan from the heat and stir in the vanilla extract. This will add a lovely warmth to the filling, enhancing its overall flavor profile.
Step 8: Cool and Store
Allow it to cool before using it in pies or other desserts. You can store it in the refrigerator for up to one week, or freeze it for longer preservation.
Serving Suggestions & Pairings
This cherry pie filling isn’t just for pies! Serve it over pancakes, waffles, or ice cream—each bite is bound to bring a smile. For an elegant dessert, layer it with whipped cream and graham crackers for a delightful parfait.
Storage & Leftovers Guide
Store any leftover cherry pie filling in an airtight container in the fridge for up to a week. For longer storage, freeze it in small batches for up to three months. Just be sure to let it cool completely before sealing!
Kitchen Wisdom & Success Tips
- Ensure your cherries are fully ripe for the sweetest filling.
- Feel free to adjust the sugar based on your taste preference and the sweetness of the cherries.
- Always stir continuously when adding the cornstarch slurry to prevent lumps.
Flavor Variations & Adaptations
Got a little adventurous spirit? You can switch it up by adding a dash of almond extract for a nutty flavor, or even a sprinkle of cinnamon for a warm kick. If you’re feeling a bit indulgent, toss in a handful of dark chocolate chips for cherry brownies!
Reader Questions & Solutions
-
What if my filling is too runny?
- If your filling didn’t thicken enough, simply mix a bit more cornstarch with cold water and add it to the heating mixture while stirring until thickened.
-
Can I use frozen cherries?
- Absolutely! Thaw and drain the cherries, but keep in mind that you may need to adjust the cooking time due to extra moisture.
-
How can I make this filling more tart?
- Add an extra splash of lemon juice or mix in some tart cherries if you can find them!
-
Is it possible to reduce the sugar?
- Yes! Reducing the sugar by half will still yield a delicious filling, especially if the cherries are sweet.
-
Can I can the cherry filling for later use?
- Yes! You can preserve it using proper canning techniques for long-term storage. Just ensure all materials are sanitized.
Wrapping Up
Making your own homemade cherry pie filling is not just about preparing a delicious dish; it’s about creating new memories in the kitchen. With every cherry sliced and every pot stirred, you’re sharing in a time-honored tradition that celebrates sweetness in life. So, grab those fresh cherries and start this easy yet rewarding recipe. You’ll be amazed at how something so simple can bring so much joy to your table. Happy cooking!
PrintHomemade Cherry Pie Filling

A simple recipe for homemade cherry pie filling that brings fresh cherries and warm flavors to your desserts.
- Prep Time: 15 minutes
- Cook Time: 15 minutes
- Total Time: 30 minutes
- Yield: 2 cups 1x
- Category: Dessert
- Method: Stovetop
- Cuisine: American
- Diet: Vegetarian
Ingredients
- 2 cups Fresh cherries, pitted and chopped
- 1 cup Sugar
- 2 tablespoons Cornstarch
- 1/2 cup Water
- 2 tablespoons Lemon juice
- 1 teaspoon Vanilla extract
Instructions
- Prepare the cherries by pitting and chopping them, allowing their juices to flow freely.
- Combine the cherries with sugar and lemon juice in a saucepan.
- Create a slurry by mixing cornstarch with water in a small bowl.
- Simmer the cherry mixture over medium heat until it starts to simmer.
- Thicken the filling by gradually adding the cornstarch slurry while stirring continuously.
- Cook until thick and bubbly.
- Infuse with flavor by removing from heat and stirring in vanilla extract.
- Cool before using in desserts or storing for later.
Notes
Store any leftovers in an airtight container in the fridge for up to a week or freeze in small batches for longer preservation.
Nutrition
- Serving Size: 1/4 cup
- Calories: 105
- Sugar: 20g
- Sodium: 1mg
- Fat: 0g
- Saturated Fat: 0g
- Unsaturated Fat: 0g
- Trans Fat: 0g
- Carbohydrates: 24g
- Fiber: 1g
- Protein: 0.5g
- Cholesterol: 0mg