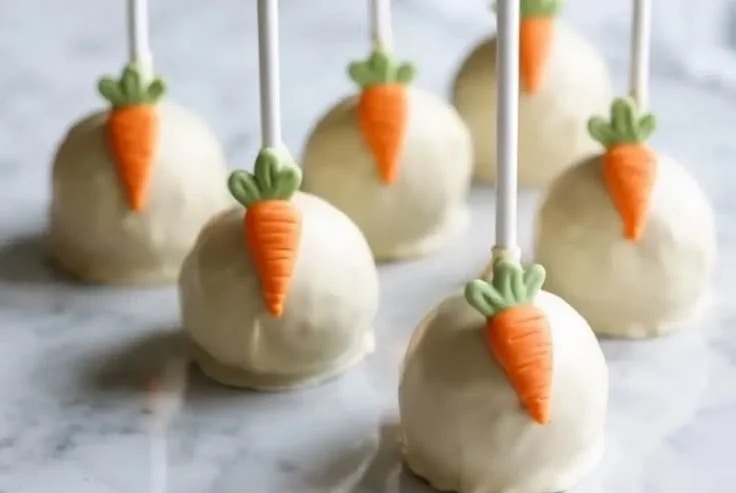
Is there anything quite like the sweet, warm aroma of carrot cake baking in your kitchen? It’s a nostalgic scent that wraps around you like a favorite childhood blanket, evoking memories of birthdays, family gatherings, and the simple joy of sharing something delicious. Today, I’m excited to share with you a delightful spin on this classic treat: Carrot Cake Pops! They’re fun, portable, and a guaranteed hit at any gathering—perfect for both casual snacking and festive celebrations.
Recipe Timing
- Prep Duration: 20 minutes
- Active Cooking: 30 minutes
- Total Duration: 1 hour 20 minutes (including cooling and setting time)
- Portion Size: About 18-20 pops
- Complexity: Simple
Nutritional Recipe
- Calories per portion: Approximately 150 calories
- Protein: 2g per serving
- Carbs: 18g per serving
- Fats: 8g per serving
- Fiber: 0.5g per serving
- Sugars: 10g per serving
- Sodium: 180mg per serving
Why You’ll Love This Carrot Cake Pops
These Carrot Cake Pops aren’t just adorable—they’re a delightful celebration of flavors! The sweetness of carrots, the creamy decadence of cream cheese frosting, and the rich exterior of chocolate coating come together in every bite. They’re easy to customize, so you can dress them up with festive sprinkles for holidays or keep them simple for an afternoon treat. Plus, they’re gluten-free if you opt for a gluten-free cake mix, making them accessible for everyone to enjoy.
The Complete Cooking Journey
Making these cake pops is not just about cooking—it’s about the experience. From mixing flavors to decorating, it’s an adventure filled with creativity and joy. What’s more, you can easily involve your family or friends in the process. Rolling the cake into balls and dipping them in colorful coatings makes for a fun kitchen activity.
Ingredients:
- 1 box carrot cake mix
- 3 eggs
- 1/2 cup vegetable oil
- 1/2 cup water
- 1 cup cream cheese frosting
- 1 package candy coating or chocolate
- Cake pop sticks
- Sprinkles (optional)
Method:
### Step 1: Prepare the Carrot Cake Mixture
Prepare the carrot cake mix according to the package instructions, whisking together the eggs, vegetable oil, and water until smooth. Pour the batter into a prepared pan and bake until a toothpick comes out clean.
### Step 2: Allow the Cake to Cool Completely
Once baked, allow the cake to cool completely in the pan on a wire rack. This step is crucial—you want to avoid melting your frosting when mixing!
### Step 3: Crumble the Cake
Crumble the cooled cake into a large bowl. Use your hands or a fork to break it down into fine crumbs.
### Step 4: Combine with Frosting
Add the cream cheese frosting to the crumbled cake and mix until well combined. The mixture will be sticky but should hold together when pressed.
### Step 5: Form into Balls
Roll the mixture into small balls (about the size of a golf ball) and place them on a baking sheet lined with parchment paper.
### Step 6: Freeze the Cake Balls
Insert cake pop sticks into each ball and freeze for about 30 minutes. This will help them maintain their shape during the coating process.
### Step 7: Melt the Candy Coating
While the pops are chilling, melt the candy coating or chocolate according to package instructions. A microwave works wonders here—just be sure to do it in short bursts to avoid burning.
### Step 8: Dip Each Cake Pop
Take each chilled cake pop from the freezer, dip it into the melted coating, and let the excess drip off. This can get a little messy, so a spoon can help manage the drips!
### Step 9: Decorate and Set
If you wish, now’s the time to sprinkle on those festive decorations! Allow the pops to set on a baking sheet until the coating hardens completely.
Serving Suggestions & Pairings
These Carrot Cake Pops are fantastic on their own, but they can also be served alongside a cup of coffee or tea for an afternoon pick-me-up. Consider pairing them with a fruit platter or a bowl of mixed nuts for a balanced snack table.
Storage & Leftovers Guide
Store any leftover cake pops in the refrigerator in an airtight container for up to a week. If you’d like to keep them for a longer period, they freeze beautifully! Just place them in a single layer in a freezer-safe bag for up to three months.
Kitchen Wisdom & Success Tips
- Make sure your cake is entirely cool before mixing with frosting; otherwise, the heat can make your mixture too gooey.
- If the coating isn’t sticking to the pops, try chilling them for a few more minutes in the freezer.
- Experiment with different coatings! White chocolate, dark chocolate, or even colored candy melts can offer a nice variation.
Flavor Variations & Adaptations
Feel free to spice things up! You could add crushed pineapple for extra moisture, chopped nuts for a delightful crunch, or even swap the cream cheese frosting for chocolate frosting for a sweeter twist.
Reader Questions & Solutions
- What can I substitute for cake mix? You can use homemade carrot cake batter if you prefer, just ensure the consistency remains close to a pre-packaged mix.
- Why did my cake pops fall apart? This could be due to the mixture being too dry, or the cake balls not being chilled enough. Make sure to follow the freezing instructions closely.
- Can I use gluten-free cake mix? Absolutely! Gluten-free mixes work just as well and still yield tasty pops.
- How can I ensure my coating is smooth? A good trick is to let the chocolate cool slightly before dipping your pops; too hot can cause them to melt and be uneven.
- Can I make these in advance? Yes! These cake pops can be made ahead of time and stored in the fridge or freezer, making them great for prepping for events.
Wrapping Up
These Carrot Cake Pops are not only simple to make but also a joyous way to bring friends and family together. Whether you’re celebrating a special occasion or just indulging in a sweet treat at home, these pops will fill your day with warmth and flavor. So roll up your sleeves and get ready to create something delightful—your tastebuds will thank you for it! Happy baking!
PrintCarrot Cake Pops
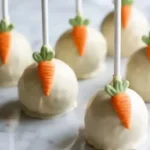
Delightful carrot cake pops coated in chocolate, perfect for casual snacking and festive celebrations.
- Prep Time: 20 minutes
- Cook Time: 30 minutes
- Total Time: 80 minutes
- Yield: 18-20 pops 1x
- Category: Dessert
- Method: Baking
- Cuisine: American
- Diet: Vegetarian
Ingredients
- 1 box carrot cake mix
- 3 eggs
- 1/2 cup vegetable oil
- 1/2 cup water
- 1 cup cream cheese frosting
- 1 package candy coating or chocolate
- Cake pop sticks
- Sprinkles (optional)
Instructions
- Prepare the carrot cake mixture according to the package instructions, whisking together the eggs, vegetable oil, and water until smooth. Pour the batter into a prepared pan and bake until a toothpick comes out clean.
- Allow the cake to cool completely in the pan on a wire rack.
- Crumble the cooled cake into a large bowl.
- Add the cream cheese frosting to the crumbled cake and mix until well combined.
- Roll the mixture into small balls (about the size of a golf ball) and place them on a baking sheet lined with parchment paper.
- Insert cake pop sticks into each ball and freeze for about 30 minutes.
- Melt the candy coating or chocolate according to package instructions.
- Dip each chilled cake pop into the melted coating and let the excess drip off.
- Decorate if desired and allow the pops to set on a baking sheet until the coating hardens completely.
Notes
Store any leftover cake pops in the refrigerator in an airtight container for up to a week. They can also be frozen for up to three months.
Nutrition
- Serving Size: 1 pop
- Calories: 150
- Sugar: 10g
- Sodium: 180mg
- Fat: 8g
- Saturated Fat: 2g
- Unsaturated Fat: 6g
- Trans Fat: 0g
- Carbohydrates: 18g
- Fiber: 0.5g
- Protein: 2g
- Cholesterol: 30mg