Nothing says “home” like the warm embrace of a freshly baked cherry pie. I still remember the first time I baked one. I was trying to impress my family during our annual summer gathering, and after several failed attempts at various desserts, I finally decided to muster up the courage to tackle this classic. As the sweet scent of cherries filled the air, I was immediately transported to my childhood, where my grandmother would make this very dessert every year, filling our home with love and laughter. Inspired by her legacy, I dove into the baking adventure and discovered a whole new world of flavors, feelings, and connections.
Now, I want to share this delightful cherry pie recipe with you. Whether it’s a family gathering, a cozy night in, or just a sweet treat to brighten your day, this pie is sure to evoke warm memories and smiles.
Recipe Timing
- Prep Duration: 20 minutes
- Active Cooking: 50 minutes
- Total Duration: 1 hour 10 minutes
- Portion Size: 8 servings
- Complexity: Simple
Nutritional Recipe
- Calories per portion: Approximately 250
- Protein: 2g per serving
- Carbs: 40g per serving
- Fats: 10g per serving
- Fiber: 2g per serving
- Sugars: 20g per serving
- Sodium: 150mg per serving
Why You’ll Love This Cherry Pie Recipe
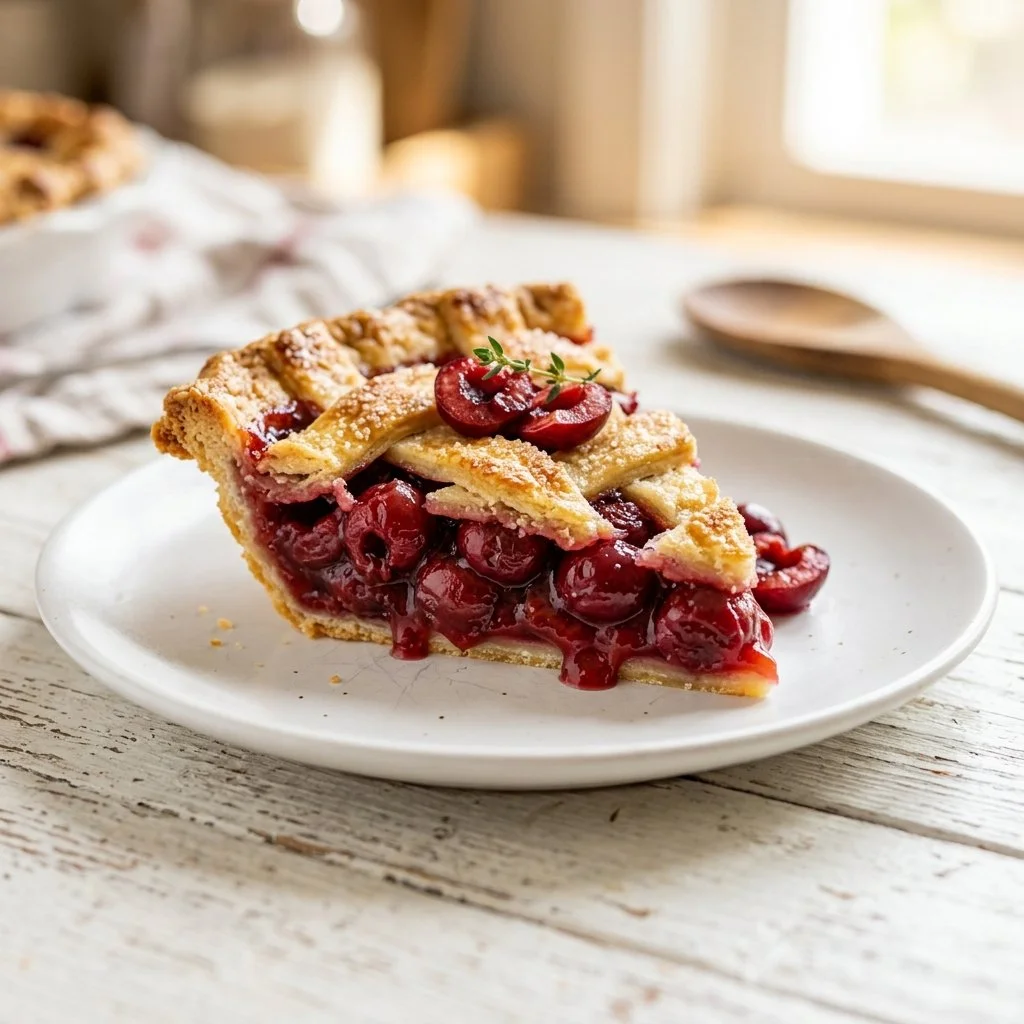
This cherry pie is a perfect blend of sweetness and tartness, with vibrant cherries nestled in a flaky crust that melts in your mouth. The vanilla extract adds a comforting depth while the touch of lemon juice brightens the flavors beautifully. It’s simple to prepare, making it a fantastic project for bakers of all skill levels. Plus, there’s something incredibly satisfying about cutting into your own homemade pie and serving it to loved ones. It’s not just a dessert; it’s a shared experience enriched with nostalgia and warmth.
The Complete Cooking Journey
Every step in creating this cherry pie is a delightful journey. From combining the juicy cherries with sugar and cornstarch to the fragrant aroma of baking filling your kitchen, each moment is infused with joy. Let’s dive into this journey together and create something truly special!
Ingredients:
- 2 cups fresh or frozen cherries
- 1 cup granulated sugar
- 3 tablespoons cornstarch
- 1 tablespoon lemon juice
- 1 teaspoon vanilla extract
- 1 tablespoon butter
- 1 double pie crust (store-bought or homemade)
- 1 egg (for egg wash)
- 1 tablespoon milk (for egg wash)
Method:
Step 1: Preheat the Oven
Preheat the oven to 425°F (220°C). This step is vital to ensure your crust bakes crispy and golden.
Step 2: Gather the Cherry Filling
In a mixing bowl, combine cherries, sugar, cornstarch, lemon juice, and vanilla extract. Stir until well combined, ensuring that every cherry is enveloped in the sugary goodness.
Step 3: Prepare the Pie Crust
Roll out one pie crust and place it into a 9-inch pie dish. Feel free to use a store-bought crust to save time, or make your own for that extra personal touch!
Step 4: Fill the Crust
Pour the cherry mixture into the crust, letting it settle beautifully. Dot the filling with butter, which adds richness and a delightful flavor.
Step 5: Cover the Pie
Roll out the second pie crust and place it over the filling. Trim and crimp the edges to seal in all that juicy goodness. Don’t forget to cut slits in the top crust to allow steam to escape – this step creates the perfect crispy top!
Step 6: Create the Golden Finish
Beat the egg with milk and brush it over the crust for a stunning golden finish that will leave everyone in awe.
Step 7: Bake to Perfection
Bake in the preheated oven for 15 minutes, then reduce the temperature to 350°F (175°C) and bake for an additional 30-35 minutes, or until the filling is bubbly and the crust is beautifully golden brown.
Step 8: Cool and Serve
Let the pie cool before serving. This waiting period allows the flavors to settle, making each bite a delightful experience.
Serving Suggestions & Pairings
Serve this cherry pie warm or at room temperature, accompanied by a scoop of vanilla ice cream or a dollop of whipped cream. It’s the perfect treat for summer picnics, birthday celebrations, or a simple weeknight dessert. Pair it with a hot cup of coffee or a chilled glass of sparkling water for a delightful end to your meal.
Storage & Leftovers Guide
If you have any leftovers (which may be rare!), store them in an airtight container at room temperature for up to 2 days. For longer storage, cover it tightly and place it in the refrigerator for up to 5 days. You can also freeze the pie for up to 3 months. Just thaw at room temperature before serving and reheat if desired!
Kitchen Wisdom & Success Tips
- Fresh vs. Frozen: Feel free to use frozen cherries if fresh ones aren’t available. Just be sure to thaw and drain them first to avoid a watery filling.
- Cornstarch Alternative: If you don’t have cornstarch, you can substitute it with all-purpose flour, but it may alter the texture slightly.
- Dough Tips: If making your crust, chilled ingredients help create a flakier pie crust, resulting in a more enjoyable texture.
Flavor Variations & Adaptations
Add a sprinkle of cinnamon or nutmeg to the cherry filling for a warm spice flavor. You can also mix in some blueberries for a delicious berry medley. For a touch of the exotic, a splash of almond extract can enhance the cherry flavor remarkably!
Reader Questions & Solutions
-
Q: Can I use other fruits for pie?
A: Absolutely! This method works well with berries, apples, and peaches. Just adjust the sugar levels according to the sweetness of the fruit. -
Q: How can I prevent a soggy crust?
A: Pre-baking (blind baking) the bottom crust for about 10 minutes before adding the filling can help prevent sogginess. -
Q: What should I do if my pie crust tears?
A: No worries! Patch it with a little extra dough and make a decorative design. Rustic is in style! -
Q: Can I make the filling ahead of time?
A: Yes! You can prepare it a day ahead and refrigerate. Just remember to stir it well before pouring into the crust. -
Q: How do I know when my pie is done?
A: Look for bubbling juices and a golden crust. A thermometer reading of 200°F (93°C) in the center will also indicate doneness.
Wrapping Up
Baking a cherry pie is more than just cooking; it’s about sharing happiness, creating memories, and connecting with loved ones. So roll up your sleeves, and let this recipe guide you on your culinary adventure. Embrace the sweet aroma and flavors that will surely fill your home with love and warmth. Happy baking!
PrintHomemade Cherry Pie

A delightful cherry pie that blends sweetness and tartness in a flaky crust, perfect for family gatherings or cozy nights.
- Prep Time: 20 minutes
- Cook Time: 50 minutes
- Total Time: 70 minutes
- Yield: 8 servings 1x
- Category: Dessert
- Method: Baking
- Cuisine: American
- Diet: Vegetarian
Ingredients
- 2 cups fresh or frozen cherries
- 1 cup granulated sugar
- 3 tablespoons cornstarch
- 1 tablespoon lemon juice
- 1 teaspoon vanilla extract
- 1 tablespoon butter
- 1 double pie crust (store-bought or homemade)
- 1 egg (for egg wash)
- 1 tablespoon milk (for egg wash)
Instructions
- Preheat the oven to 425°F (220°C).
- Combine cherries, sugar, cornstarch, lemon juice, and vanilla extract in a mixing bowl.
- Roll out one pie crust and place it into a 9-inch pie dish.
- Pour the cherry mixture into the crust and dot with butter.
- Roll out the second crust and place it over the filling. Seal the edges and cut slits for steam to escape.
- Beat the egg with milk and brush it over the top crust.
- Bake in preheated oven for 15 minutes, then reduce temperature to 350°F (175°C) and bake for an additional 30-35 minutes.
- Cool before serving.
Notes
Serve warm or at room temperature, optionally with vanilla ice cream or whipped cream. Store leftovers in an airtight container.
Nutrition
- Serving Size: 1 slice
- Calories: 250
- Sugar: 20g
- Sodium: 150mg
- Fat: 10g
- Saturated Fat: 4g
- Unsaturated Fat: 6g
- Trans Fat: 0g
- Carbohydrates: 40g
- Fiber: 2g
- Protein: 2g
- Cholesterol: 30mg