There’s something magical about dessert—especially when it straddles the line between indulgence and healthfulness. I remember the first time I tried a chocolate mousse. It was velvety, rich, and completely alluring. However, I often felt that sweet treat was a guilty pleasure I couldn’t enjoy too often. That was until I discovered how to make a high-protein version that satisfies my sweet tooth without derailing my healthy eating efforts. Today, I’m excited to share this incredibly simple and delicious High Protein Chocolate Mousse that brings that beloved taste back into my life every week!
Recipe Timing
- Prep Duration: 10 minutes
- Active Cooking: 0 minutes (no cooking involved!)
- Total Duration: 40 minutes (includes chilling time)
- Portion Size: Serves 4
- Complexity: Simple
Nutritional Recipe
- Calories per portion: Approximately 160 calories
- Protein: 14 grams
- Carbs: 22 grams
- Fats: 4 grams
- Fiber: 2 grams
- Sugars: 12 grams
- Sodium: 270 mg
Why You’ll Love This High Protein Chocolate Mousse
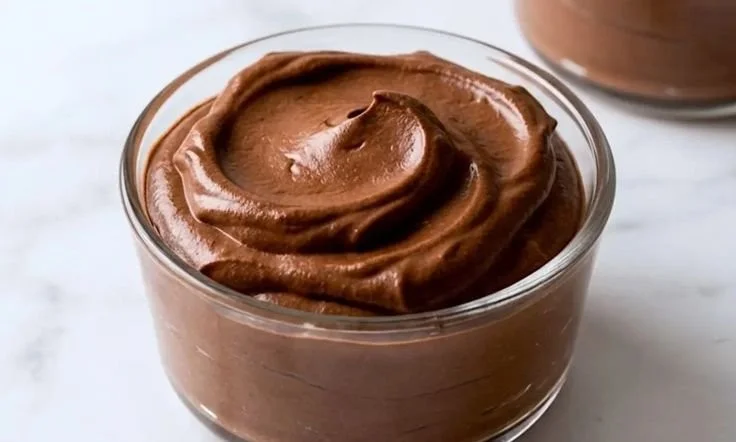
This High Protein Chocolate Mousse isn’t just a sweet treat; it’s a nutritional powerhouse! Made with protein-rich cottage cheese, it’s the perfect post-workout snack that feels like a decadent dessert. Plus, it boasts a creamy texture and a rich chocolate flavor that will have you convinced you’re enjoying something far more indulgent. Whether you’re a busy parent looking for a quick dessert or an athlete needing some post-exercise nourishment, this mousse is a win-win!
The Complete Cooking Journey
Creating this mocha delight is as easy as pie—or, should I say, mousse? Let’s walk through the steps together.
Ingredients:
- 1 cup cottage cheese
- 1/3 cup cocoa powder
- 1/4 cup honey or maple syrup
- 1 teaspoon vanilla extract
- A pinch of salt
Method:
### Step 1: Combine the Ingredients
Throw the cottage cheese, cocoa powder, honey (or maple syrup), vanilla extract, and salt into a blender or food processor. This is where the magic begins!
### Step 2: Blend Until Smooth
Turn on your blender and let it work its magic! Blend until the mixture becomes smooth and creamy, ensuring that there are no lumps. The aroma will already have you dreaming of a chocolatey paradise.
### Step 3: Taste and Adjust Sweetness
Here’s your moment to be the chef! Taste your mousse and decide if it needs a touch more sweetness. Adjust with additional honey or maple syrup to suit your preference.
### Step 4: Chill the Mousse
Transfer the silky mousse into serving dishes of your choice. Pop them in the refrigerator for at least 30 minutes. This helps it firm up perfectly, enhancing the flavors even more.
### Step 5: Serve and Enjoy!
Pull out those beautifully chilled desserts and dig in! This mousse isn’t just a treat; it’s your new favorite post-workout snack or a guilt-free dessert that feels indulgent but celebrates your health journey!
Serving Suggestions & Pairings
This mousse is delightful on its own, but why stop there? Consider topping it with some fresh berries, a dollop of whipped cream, or a sprinkle of chopped nuts for added crunch. It pairs perfectly with a strong cup of coffee or a glass of almond milk for a well-rounded snack option.
Storage & Leftovers Guide
If you have any leftovers (which is a rarity), you can store your mousse in an airtight container in the refrigerator for up to 3 days. Just give it a quick stir before serving again!
Kitchen Wisdom & Success Tips
- For an extra creamy texture, blend the ingredients longer.
- Feel free to experiment with flavored extracts like almond or mint in place of vanilla!
- If you’re after a lower-calorie sweetener, consider using a sugar substitute that measures like sugar.
Flavor Variations & Adaptations
Looking to shake things up? Try:
- Adding a spoonful of peanut butter or almond butter for a nutty twist.
- Mixing in some espresso powder for a mocha flavor that will awaken your taste buds.
- Swapping cocoa powder for a chai spice blend for a cozy, spiced version.
Reader Questions & Solutions
-
Can I use Greek yogurt instead of cottage cheese?
Absolutely! Greek yogurt will give you a similar texture, although it will change the flavor slightly. -
What if I don’t have honey or maple syrup?
You can use agave syrup or even a no-calorie sweetener to keep it low in sugar. -
Can I make this vegan?
Yes! Use a dairy-free yogurt alternative and agave as a sweetener. -
How can I make this mousse dessert for larger gatherings?
Multiply the recipe according to the number of servings you need; just remember to chill in batches if your blender is small. -
Can I freeze this mousse?
While freezing is possible, the texture might change when thawed. Enjoy fresh for the best experience!
Wrapping Up
This High Protein Chocolate Mousse has truly captivated my heart and taste buds. It’s the perfect remedy for anyone looking for a healthier dessert option without sacrificing flavor. So, gather your ingredients, and don’t hesitate to whip up this delightful confection. You deserve a little indulgence that works in harmony with your wellness goals! Enjoy every creamy, chocolatey bite!
PrintHigh Protein Chocolate Mousse
A delicious high-protein chocolate mousse that satisfies your sweet tooth without derailing your healthy eating efforts.
- Prep Time: 10 minutes
- Cook Time: 0 minutes
- Total Time: 40 minutes
- Yield: 4 servings 1x
- Category: Dessert
- Method: No Cooking
- Cuisine: American
- Diet: High Protein, Vegetarian
Ingredients
- 1 cup cottage cheese
- 1/3 cup cocoa powder
- 1/4 cup honey or maple syrup
- 1 teaspoon vanilla extract
- A pinch of salt
Instructions
- Combine the cottage cheese, cocoa powder, honey (or maple syrup), vanilla extract, and salt into a blender or food processor.
- Blend until the mixture becomes smooth and creamy, ensuring that there are no lumps.
- Taste your mousse and adjust sweetness with additional honey or maple syrup if necessary.
- Chill the mousse in the refrigerator for at least 30 minutes.
- Serve and enjoy your delightful dessert!
Notes
This mousse pairs perfectly with fresh berries, whipped cream, or chopped nuts. It can be stored in an airtight container in the refrigerator for up to 3 days.
Nutrition
- Serving Size: 1 serving
- Calories: 160
- Sugar: 12g
- Sodium: 270mg
- Fat: 4g
- Saturated Fat: 2g
- Unsaturated Fat: 2g
- Trans Fat: 0g
- Carbohydrates: 22g
- Fiber: 2g
- Protein: 14g
- Cholesterol: 10mg