
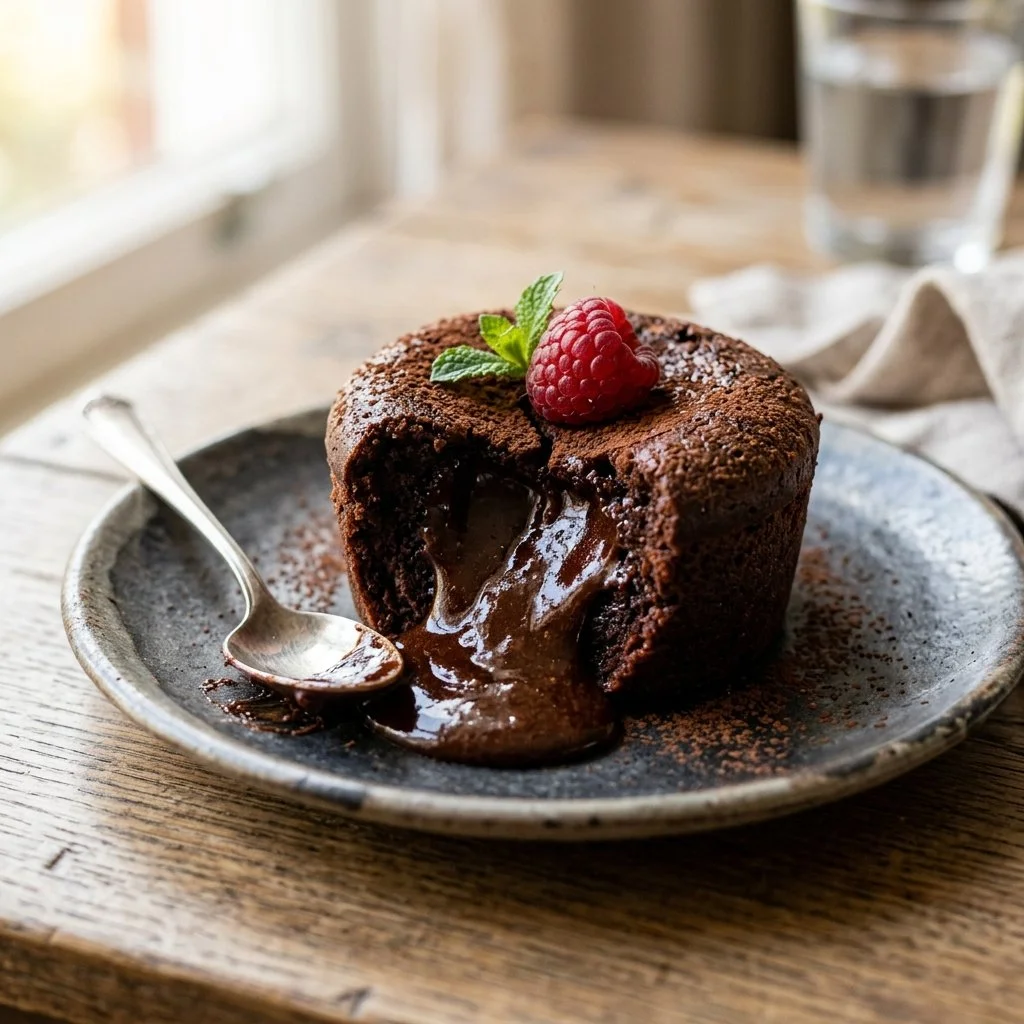
There’s something magical about the first bite of a molten chocolate cake. As the fork pierces the warm, tender outer layer, rich, gooey chocolate floods the plate, creating a puddle of decadence that will mesmerize anyone lucky enough to share in the moment. This dessert is more than just a sweet indulgence; it’s a nostalgic nod to countless celebrations, late-night cravings, and unexpected delights that can turn an ordinary evening into something unforgettable.
Recipe Timing
- Prep Duration: 10 minutes
- Active Cooking: 15 minutes
- Total Duration: 25 minutes
- Portion Size: Serves 4
- Complexity: Simple
Nutritional Recipe
- Calories per portion: Approximately 400
- Protein: 6g
- Carbs: 44g
- Fats: 26g
- Fiber: 1g
- Sugars: 31g
- Sodium: 50mg
Why You’ll Love This Molten Chocolate Cake
This molten chocolate cake encapsulates everything we love about dessert—intense chocolate flavor, a rich, velvety texture, and a bit of drama as you break into its molten center. Whether you’re celebrating a special occasion or simply need a little comfort, this cake fits the bill. Plus, it’s easier than you might think to whip up, making it perfect for both novice bakers and seasoned chefs alike.
The Complete Cooking Journey
Let’s embark on a journey that transforms a handful of simple ingredients into a show-stopping dessert. With just a few steps, you’ll create an impressive dish that’s sure to leave your guests in awe (and that can be kept a secret!).
Ingredients:
- 1 cup dark chocolate
- 1/2 cup unsalted butter
- 1 cup powdered sugar
- 2 large eggs
- 2 large egg yolks
- 1 teaspoon vanilla extract
- 1/2 cup all-purpose flour
- Pinch of salt
Method:
Step 1: Preheat & Prepare the Ramekins
Preheat the oven to 425°F (220°C) and grease four ramekins to ensure that your molten cakes slide out easily after baking.
Step 2: Melt the Chocolate and Butter
Combine the dark chocolate and unsalted butter in a bowl set over simmering water. Stir until both are melted and smooth, creating a luxurious chocolate base.
Step 3: Mix in the Sugar
Once melted, remove the bowl from heat and stir in the powdered sugar. Mix until the sugar is fully incorporated and the mixture is glossy.
Step 4: Incorporate the Eggs
Add the two large eggs and two egg yolks to the chocolate mixture, whisking thoroughly until well combined. This step is crucial for the cake’s structure and rich texture.
Step 5: Add Flavor and Dry Ingredients
Stir in the teaspoon of vanilla extract for a burst of flavor, followed by the flour and a pinch of salt. Mix gently until just combined, being careful not to overmix.
Step 6: Divide and Fill the Ramekins
Carefully divide the batter among the greased ramekins, filling each about 3/4 full. Leave some space for the cake to rise slightly in the oven.
Step 7: Bake to Perfection
Place the ramekins in the preheated oven and bake for 12-14 minutes. Watch closely—the edges should be firm but the center should still look soft and jiggly, a hallmark of molten chocolate cake.
Step 8: Cool and Serve
Once baked, let the cakes cool in the ramekins for just one minute. Then, carefully invert them onto plates, revealing their delicious, gooey centers. Serve warm for the best experience!
Serving Suggestions & Pairings
For a delightful presentation, dust with powdered sugar or cocoa powder. Fresh berries or a scoop of vanilla ice cream on the side elevate the experience, adding color and creaminess. A drizzle of salted caramel sauce can also complement the rich chocolate flavor beautifully.
Storage & Leftovers Guide
If you happen to have any leftovers (though unlikely!), they can be stored in the refrigerator for up to 2 days. Reheat them gently in the microwave for a few seconds—just enough to warm the center without overcooking.
Kitchen Wisdom & Success Tips
- Use high-quality dark chocolate for a rich flavor.
- Prepare a few minutes ahead to enjoy fresh cakes without any last-minute stress.
- Don’t skip the cooling step; it’s necessary for the molten center to remain intact when inverted.
Flavor Variations & Adaptations
Consider adding a hint of espresso powder for a sophisticated twist, or try flavored extracts like almond or orange to switch things up. For a whimsical touch, add a few chocolate chips or caramel pieces into the batter before baking for extra gooeyness.
Reader Questions & Solutions
-
What if I don’t have ramekins?
Use a muffin tin for individual servings; just adjust the baking time. -
Can I make this batter ahead of time?
Yes! Prepare the batter and refrigerate it in the ramekins. Bake directly from the fridge, adding an extra minute or two to the bake time. -
How can I tell if they’re done baking?
Look for firm edges and a soft, slightly jiggly center. You can also gently press the top with your finger; it should spring back. -
What if my chocolate cake doesn’t ooze?
It may be that they were baked too long. Aim for that perfect underbake with a soft center next time. -
Can I make this gluten-free?
Absolutely! Substitute the all-purpose flour with a gluten-free blend, and ensure your chocolate is also gluten-free.
Wrapping Up
Isn’t it amazing how something so simple and quick can bring such comfort and joy? Your friends and family will be thrilled when you surprise them with this molten chocolate cake, and you’ll enjoy every moment spent making it. So roll up your sleeves, savor the process, and indulge in the delightful experience of baking. Here’s to sweet moments and fond memories one molten cake at a time!