
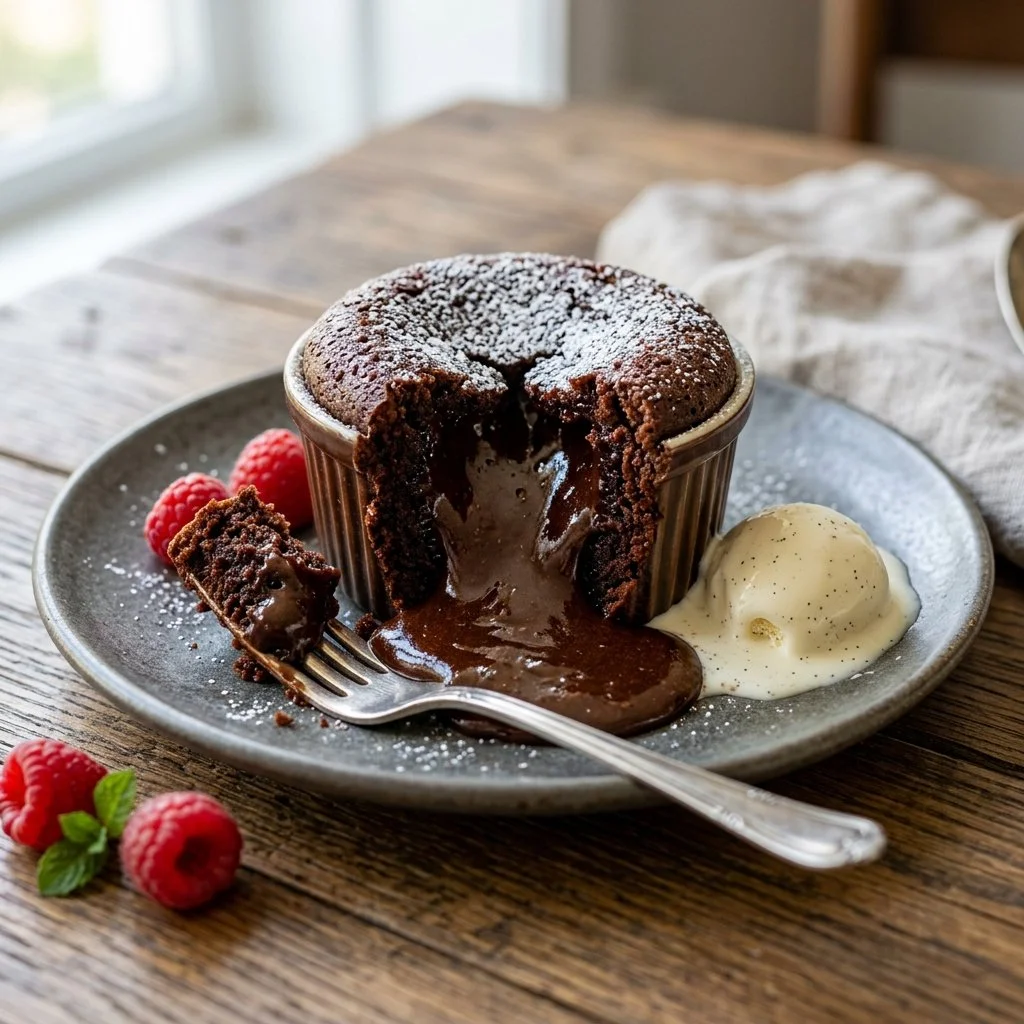
There’s something truly magical about the first bite of a molten lava cake. Picture this: you slice through the delicate outer shell, and rich, gooey chocolate erupts from within like a delicious, edible volcano. It’s a dessert that has the power to transport you to a place of pure indulgence, with each spoonful inviting you to linger just a little longer in its sweet embrace. The first time I made these enchanting treats, I was filled with both anticipation and a touch of fear. I remember the thrill of hoping for that perfect molten center while battling my inner baker’s insecurities. Spoiler alert: it turned out beautifully, and the happiness on the faces of my family as they savored the dish was worth every moment of suspense. Today, I want to share my version of this delightful recipe, as it holds a special spot in my heart and my kitchen!
Recipe Timing
- Prep Duration: 15 minutes
- Active Cooking: 14 minutes
- Total Duration: 29 minutes
- Portion Size: Serves 4
- Complexity: Simple
Nutritional Recipe
- Calories per portion: 350
- Protein: 5g
- Carbs: 36g
- Fats: 22g
- Fiber: 1g
- Sugars: 20g
- Sodium: 200mg
Why You’ll Love This Molten Lava Cake
This molten lava cake is pure indulgence; its rich flavor and warm, flowing center make it a perfect treat for special occasions or simply when you want to elevate your weekday dessert. It’s quick enough to whip up on a whim, yet impressive enough to wow your guests. Serve it alongside a scoop of vanilla ice cream, and you have a dessert that’s not just a feast for the taste buds, but a feast for the eyes too!
The Complete Cooking Journey
Making molten lava cake is an adventure in itself. From the mesmerizing moment chocolate and butter meld into a glossy, inviting mixture to the heart-racing anticipation as those little ramekins bake in the oven, this recipe is an experience to savor. Perhaps it’s the smell of chocolate wafting through the kitchen or the joyful gasp when you present your guests with the final product that makes this dish truly unforgettable.
Ingredients:
- 1/2 cup unsalted butter
- 1 cup semi-sweet chocolate chips
- 2 large eggs
- 2 large egg yolks
- 1/4 cup granulated sugar
- 2 tablespoons all-purpose flour
- 1/4 teaspoon salt
Method:
Step 1: Preheat and Prepare
Preheat your oven to 425°F (220°C). Grease four ramekins with butter and dust them lightly with flour to ensure the cakes slide out perfectly after baking.
Step 2: Melt Butter and Chocolate
In a microwave-safe bowl, melt the butter and chocolate chips together in 30-second intervals, stirring until smooth. Enjoy the smell of chocolate filling your kitchen as you mix!
Step 3: Whisk Eggs and Sugar
In another bowl, whisk together the eggs, egg yolks, and granulated sugar until the mixture becomes pale and thick. This is when the magic starts, as the sugar and eggs marry into a delightful custard-like consistency.
Step 4: Combine Chocolate and Egg Mixtures
Stir the melted chocolate into the egg mixture until everything is beautifully combined. This is your chocolate dream coming to life!
Step 5: Fold in Flour and Salt
Gently fold in the flour and salt until just combined. Be careful not to overmix; we want to keep that light texture.
Step 6: Portion the Batter
Divide the batter among the prepared ramekins, filling each about three-quarters full. It’s okay if you don’t get the portions perfectly equal; a little imperfection adds to the charm!
Step 7: Bake to Perfection
Place the ramekins on a baking sheet and bake for about 12-14 minutes, until the edges are firm but the center remains soft and jiggly. Keep an eye on them – this is the moment of truth!
Step 8: Cool and Serve
Let them cool for 1 minute before inverting onto plates. Serve immediately, either on their own or with a scoop of vanilla ice cream melting into the warm chocolate. Trust me; it’s heavenly!
Serving Suggestions & Pairings
Next to a scoop of creamy vanilla ice cream (or a dollop of freshly whipped cream), this molten lava cake becomes a symphony of flavors and textures. For an extra touch, sprinkle with powdered sugar or add a few fresh berries for a burst of color. You could even drizzle a bit of caramel sauce for an added level of decadence!
Storage & Leftovers Guide
If you have leftovers (though I doubt you will!), you can cover the ramekins with plastic wrap and refrigerate them for up to 2 days. To reheat, pop them in the microwave for about 30 seconds, until warmed through, but be careful not to overdo it.
Kitchen Wisdom & Success Tips
- Room Temperature Ingredients: Make sure your eggs are at room temperature for the best results. It helps with the mixing process and ensures a light fill.
- Don’t Overbake: The key to the molten center is to make sure not to overbake. Every oven is different, so it’s good to check a couple of minutes early.
- Ramekins Matter: If you don’t have ramekins, you can use muffin tins, but be aware that the baking time may vary.
Flavor Variations & Adaptations
Want to mix things up? Consider adding a hint of espresso or a splash of your favorite liqueur to deepen the chocolate flavor. You can also experiment by mixing in a few tablespoons of peanut butter or Nutella before baking for a delicious twist!
Reader Questions & Solutions
-
What if my cakes stick to the ramekin?
- Always grease and dust your ramekins well. If they do stick, gently run a knife around the edge before inverting.
-
Can I make these ahead of time?
- Yes! You can prepare the batter and store it in the fridge for up to 24 hours. Just bring it to room temperature before baking.
-
How can I ensure the center stays gooey?
- The secret is closely monitoring the baking time. Every oven is slightly different, so start checking at 10 minutes.
-
Is it normal for the edges to harden while the center stays soft?
- Absolutely! My favorite part of this recipe is that contrast, and that’s a sign you’ve done it right.
-
Can I substitute the chocolate chips?
- You could use dark chocolate or bittersweet chocolate instead if you prefer a richer flavor, adjusting the sugar slightly if desired.
Wrapping Up
There’s true joy in baking this Molten Lava Cake, from the aroma of melting chocolate to the thrill of the first bite when the ooey-gooey center flows out. Whether you’re celebrating a special occasion or simply treating yourself on a Tuesday, this dessert is sure to impress and delight. So, roll up your sleeves, gather your ingredients, and let the magic unfold in your kitchen. You’ve got this! Happy baking!