
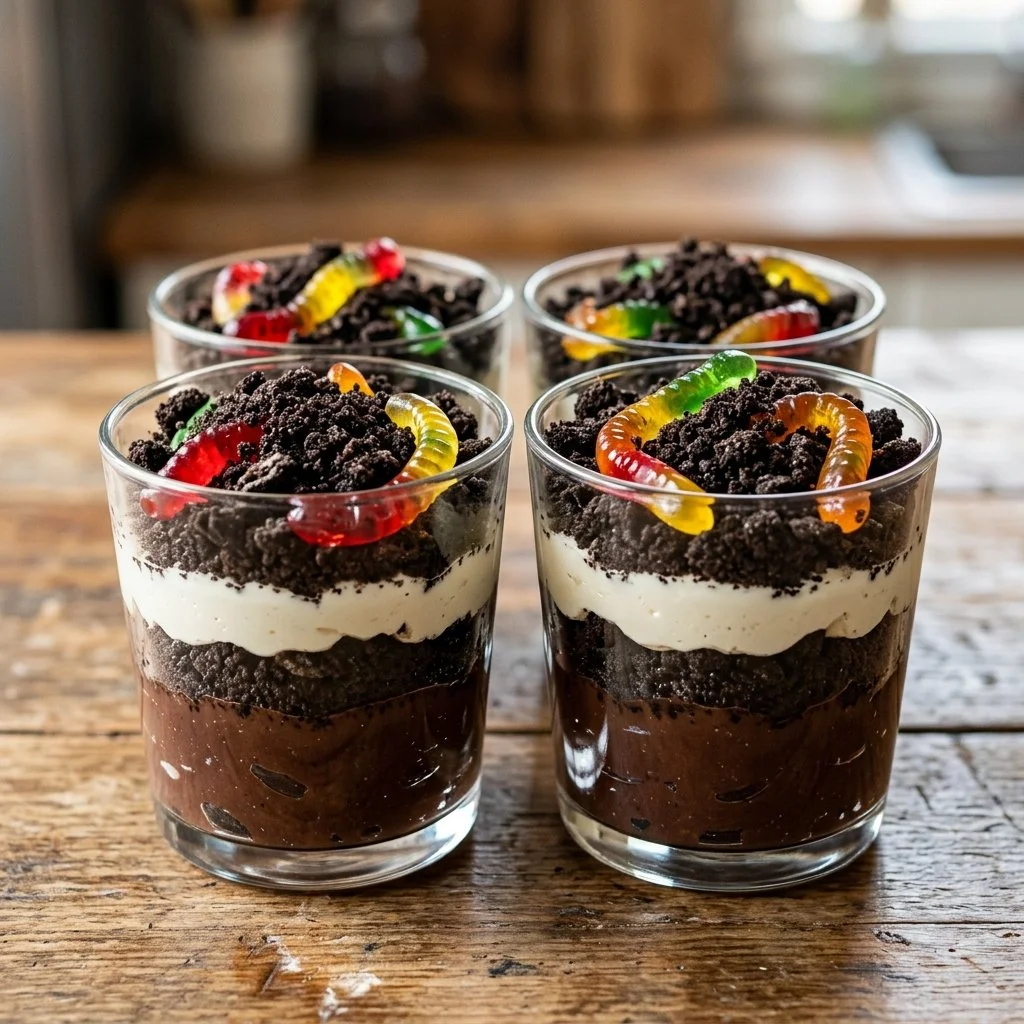
It was a rainy Saturday afternoon when my youngest daughter, Lily, burst into the kitchen, her eyes glowing with excitement. “Can we make something fun, Mommy?” she pleaded, clutching a bag of Oreo cookies. Instantly, my mind raced back to my own childhood – those blissful days of playing with mud and worms in the backyard, delighting in the wonders of nature… and then found myself combining those memories with a sweet treat. That’s how our family recipe for Oreo Dirt Cups came to life! This delightful dessert is a playful blend of nostalgia and creativity, perfect for rain-soaked afternoons or any time you want to bring a little joy to your home.
Recipe Timing
- Prep Duration: 15 minutes
- Active Cooking: 5 minutes
- Total Duration: 2 hours (includes chilling time)
- Portion Size: Serves 6
- Complexity: Simple
Nutritional Recipe
- Calories per portion: Approximately 350
- Protein: 4g per serving
- Carbs: 50g per serving
- Fats: 16g per serving
- Fiber: 1g per serving
- Sugars: 30g per serving
- Sodium: 220mg per serving
Why You’ll Love This Oreo Dirt Cups
Oreo Dirt Cups are not just a sweet treat; they evoke childhood memories and bring smiles to faces of all ages. The combination of crunchy Oreo crumbs, silky chocolate pudding, and fluffy whipped cream creates a delightful textural experience. Plus, who can resist the vibrant gummy worms peeking out as if they’ve just wriggled their way through the “dirt”? Perfect for birthday parties, special gatherings, or simply an afternoon snack, these cups are as fun to make as they are to eat!
The Complete Cooking Journey
As you prepare these irresistible Oreos Dirt Cups, you’ll find that the assembly is not only simple but allows for creativity. Lily gets to crush the cookies, and her face lights up with pride when she layers the cups. The anticipation builds as we add the finishing touches. We pop them in the fridge, and soon enough, we’re digging into our muddy masterpiece. Every bite is a delightful mix of sweetness, creaminess, and that satisfying crunch.
Ingredients:
- Oreos
- Chocolate pudding
- Whipped cream
- Gummy worms
- Plastic cups
Method:
-
Step 1: Crush the Oreos
Start by crushing the Oreo cookies into fine crumbs. A classic rolling pin works perfectly, or you can use a food processor if you have one handy.
-
Step 2: Prepare the Chocolate Pudding
Follow the package instructions to prepare your chocolate pudding. This step is quick and should take just a few minutes.
-
Step 3: Build the Layers
In a plastic cup, layer chocolate pudding at the bottom, followed by a generous layer of crushed Oreos. This is where the magic starts!
-
Step 4: Add More Pudding
Spoon another layer of chocolate pudding over the crushed Oreos. Let those chocolatey dreams come to life!
-
Step 5: Top with Whipped Cream
Add a fluffy layer of whipped cream on top, creating a cloud-like finish.
-
Step 6: Final Touches
Sprinkle more crushed Oreos on top and place those cute gummy worms, ready for their adventure in "dirt"!
-
Step 7: Chill for Perfection
Chill the cups in the refrigerator for at least an hour before serving. This allows the flavors to meld and the pudding to set perfectly.
Serving Suggestions & Pairings
These Oreo Dirt Cups stand beautifully on their own, but for an extra delightful touch, consider serving them alongside fresh fruit like strawberries or bananas. They also pair wonderfully with a scoop of vanilla ice cream for those extra-sweet cravings!
Storage & Leftovers Guide
If you have any leftovers (which is rare!), cover them tightly and store them in the refrigerator for up to 2 days. Just be aware that the Oreos may become softer over time, but the flavors will still be delicious.
Kitchen Wisdom & Success Tips
- When crushing Oreos, don’t worry about making them too uniform; the variety in sizes adds to the authentic ‘dirt’ look.
- Try using sugar-free pudding for a lighter alternative, or whip up homemade pudding if you’re feeling adventurous.
- Let your kids help in decorating; it’s a fun way for them to express their creativity.
Flavor Variations & Adaptations
Feel free to get creative! Swap the chocolate pudding for vanilla or butterscotch if you prefer a twist. You could even add other gummy candies, like candy eyeballs or cute bugs, to enhance the fun!
Reader Questions & Solutions
-
Why are my Oreos too crumbly?
Use a heavier rolling pin for crushing, or place the cookies in a plastic bag and crush them with your hands – you might enjoy it! -
Can I use homemade pudding?
Absolutely! Just ensure it’s well-chilled before layering; we want that dreamy texture. -
How can I make this gluten-free?
Replace the Oreos with gluten-free cookies; many brands offer delicious alternatives. -
What can I substitute for whipped cream?
You can use whipped coconut cream or whipped topping for a dairy-free option. -
How do I ensure the layers stay neat?
Let each layer set a bit in the fridge before adding the next one; patience pays off!
Wrapping Up
Oreo Dirt Cups are not only delicious but also a joyful way to bond with loved ones in the kitchen. They transform ordinary moments into sweet memories, making every bite a taste of playful nostalgia. So grab those Oreos, invite your family in, and start building your little cups of joy today! It’s time to get your hands dirty—after all, that’s where the fun is!